Lenses CLI
Lenses offers a powerful CLI (command line tool) built in Go that utilizes the REST and WebSocket APIs of Lenses to communicate with Apache Kafka and exposes a straightforward way to perform common data engineering and site reliability engineering tasks such as the following:
- Automate your CI/CD (continuous-integration and continuous-delivery).
- Create topics/acls/quotas/schemas/processors/connectors/policies/alerts/alert-settings.
- Deploy and manage SQL processors in all modes, including deployment to Kubernetes.
- Deploy and manage Connectors.
- Run SQL queries on Apache Kafka both browsing and continuous live queries.
- Change or retrieve configurations to store in GitHub.
Installation
Binaries are available for download:
Linux (2.3) MacOS (2.3) Windows (2.3)
Or you can use the Go go get command:
$ go get -u github.com/lensesio/lenses-go/cmd/lenses-cli
Tip
The new release contains various fixes, table view for a more user-friendly environment, improved end-user messages on CRUD commands and failures and new commands that let you work with the latest Lenses 2.1 version. View all changes from the previous CLI release (for developers)
Getting started
The lenses-cli application has a very straightforward way to setup
an authenticated user for Lenses communication, including kerberos authentication.
The configure command will guide you through the process.
$ lenses-cli configure
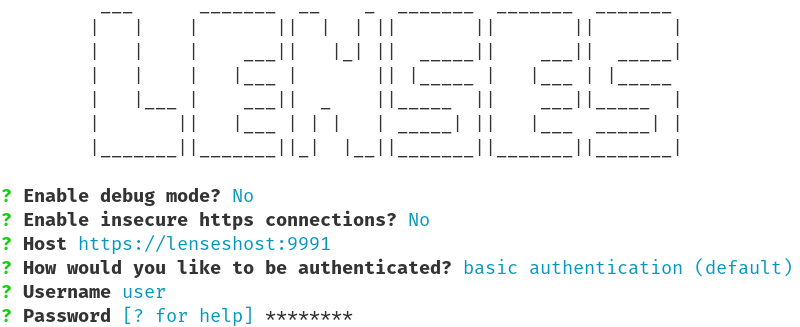
The given data will be saved in ~/.lenses/lenses-cli.yml. Depending on the configuration, this file will look similar to the following:
CurrentContext: master
Contexts:
  master:
    Host: http://lenseshost:9991
    Basic:
      Username: user
      Password: password_encoded
  myKerberos:
    Host: https://lenseshost:9991:443
    Insecure: true
    Debug: true
    Kerberos:
      ConfFile: /etc/krb5.conf
      WithPassword:
        Username: user
        Password: password_encoded
        Realm: mydomain.realm
Note
Older configuration formats are still compatible.
Now you are ready to move on with firing some commands like
lenses-cli processors to list all available SQL processors.
You can still pass the credentials and host via the command line flags.
They take precedence over the data in the configuration file. Alternatively, you can
supply a different configuration file with the --config flag as follows:
lenses-cli --config config.yaml processors
The following precedence is used:
- Individual flags, host, user and pass.
- Config file flag.
- Config file in
$HOME/.lenses/.
Tip
You can reset existing config contexts through configure --context=existingContext --reset command.
Passing credentials through flags
You can always individually configure and log in on the fly for a single command. This is very helpful when you use multi accounts:
$ lenses-cli --host="http://lenseshost:9991" --user="user" --pass="password" $command
All kerberos authentication methods are supported (password, keytab or from ccache):
$ lenses-cli --host="https://lenseshost:9991" --insecure --timeout=30s --kerberos-conf="/etc/krb5.conf" [--kerberos-realm="domain.realm"] [--kerberos-keytab="/tmp/krb5.keytab"] [--kerberos-ccache="/tmp/krb5-ccache.txt"] [--user="kerberosUsername"] [--password="kerberosPassword"] $command
Configuration Contexts
Lenses CLI is an application with environmental awareness. It accepts multi-environment configuration structure, each environment is known as “Context”, when no credentials flags are present then the “Current Context” is being used.
Create a new configuration for an environment:
$ lenses-cli context set newContextName
Reset an existing Context:
$ lenses-cli configure --context=existingContext --reset
Switch between Contexts:
$ lenses-cli context use existingContext
View and verify the current Context:
$ lenses-cli context
View all available Contexts:
$ lenses-cli contexts
Tip
This command includes validation messages for each context’s configuration between its credentials and its particular lenses box (Host).
Getting help
Each command has a --help flag that will show you the available
flags and a simple input example for the specific command.
For example, if we do lenses-cli --help, we will see the available
(sub)commands and the global flags of the entire lenses-cli application:
Lenses-cli is the command line client for the Lenses REST API.

Usage:
lenses-cli [command]

Examples:
acl -h

Available Commands:
acl         Manage Access Control List
acls        Print the list of the available Kafka Access Control Lists
alert       Manage alerts
alerts      Print the registered alerts
audits      List the last buffered audit entries
configs     Print the whole lenses box configs
configure   Setup your environment for extensive CLI use. Create and save the required CLI configuration and client credentials
connector   Get information about a particular connector based on its name
connectors  List of active connectors' names
context     Print the current context or modify or delete a configuration context using the update and delete subcommands
contexts    Print and validate (through calls to the servers) all the available contexts from the configuration file
export      export a landscape
help        Help about any command
import      import a landscape
init-repo   Initialise a git repo to hold a landscape
license     Print the license information for the connected lenses box
logs        List the info or metrics logs
mode        Print the configuration's execution mode
policies    List all policies
policy      Manage a policy
processor   Manage a processor based on the processor id; pause, resume, update runners, delete or create a new processor
processors  List of all available processors
quota       Manage a quota, create a new quota or update and delete an existing one
quotas      List of all available quotas
schema      Manage particular schema based on its name, get a schema based on the ID or register a new one
schemas     List all available schemas
shell       shell
sql         sql queries, either browsing for continuous (live-stream)
topic       Manage particular topic based on the topic name, retrieve it or create a new one
topics      List all available topics
user        List information about the authenticated logged user such as the given roles given by the lenses administrator or manage the user's profile
version     Print the current version of lenses-cli

Flags:
    --config string            Load or save the host, user, pass and debug fields from or to a configuration file (yaml or json)
    --context string           Load specific environment, embedded configuration based on the configuration's 'Contexts'
    --debug                    Print some information that are necessary for debugging
    --header-bgcolor string    Table headers background gcolor=white
    --header-fgcolor string    Table headers forground gcolor=black
-h, --help                     help for lenses-cli
    --host string              Lenses host
    --insecure                 All insecure http requests
    --kerberos-ccache string   Kerberos keytab file
    --kerberos-conf string     krb5.conf
    --kerberos-keytab string   KeyTab file
    --kerberos-realm string    Kerberos realm
    --output string            TABLE, JSON or YAML results and hide all the info messages (default "table")
    --pass string              Password
    --timeout string           Timeout for the connection establishment
    --token string             Lenses auth token
    --user string              User
    --version                  version for lenses-cli

Use "lenses-cli [command] --help" for more information about a command.


Use "lenses-cli [command] --help" for more information about a command.
Another example is lenses-cli processors --help. Its output looks similar to the following:
List of all available processors

Usage:
lenses-cli processors [flags]
lenses-cli processors [command]

Examples:
processors

Available Commands:
logs        Retrieve SQL Processor logs. Available only in KUBERNETES execution mode

Flags:
    --cluster-name string   Select by cluster name, available only in CONNECT and KUBERNETES mode
-h, --help                 help for processors
    --name string          Select by processor name, available only in CONNECT and KUBERNETES mode
    --namespace string     Select by namespace, available only in KUBERNETES mode
    --pretty               Enable the pretty format for JSON output of commands (default false).
-q, --query string         Jmespath query expression. This allows for querying the JSON output of commands

Global Flags:
    --config string            Load or save the host, user, pass and debug fields from or to a configuration file (yaml or json)
    --context string           Load specific environment, embedded configuration based on the configuration's 'Contexts'
    --debug                    Print some information that are necessary for debugging
    --header-bgcolor string    Table headers background gcolor=white
    --header-fgcolor string    Table headers forground gcolor=black
    --host string              Lenses host
    --insecure                 All insecure http requests
    --kerberos-ccache string   Kerberos keytab file
    --kerberos-conf string     krb5.conf
    --kerberos-keytab string   KeyTab file
    --kerberos-realm string    Kerberos realm
    --output string            TABLE, JSON or YAML results and hide all the info messages (default "table")
    --pass string              Password
    --timeout string           Timeout for the connection establishment
    --token string             Lenses auth token
    --user string              User

Use "lenses-cli processors [command] --help" for more information about a command.
Tip
Use the -h flag on each subcommand to see the available options.
The –output flag
The --output flag, which controls the form/view of the output, can be accessed by the majority of the available commands.
The value of output can be Table, YAML or JSON. By default the results of a command are printed as a table.
Additionally, when the --output flag is set to JSON, two more optional flags are available for use named --pretty and --query.
These flags can be passed to all commands that fetch and return JSON-formatted results.
--pretty
    enable the pretty format for JSON output of commands (default false).
--query
    a jmespath query expression. This allows for querying the JSON output of commands.
    For more details view the `JMESPATH <http://jmespath.org/>`__ documentation.
Access Control Lists
Allows view and create, update and delete operations on Apache Kafka topic ACLs.
- View ACLs
View all ACLs
$ lenses-cli acls --output json
[
 {
    "resourceType": "Topic",
    "resourceName": "transactions",
    "principal": "principalType:principalName",
    "permissionType": "Allow",
    "host": "*",
    "operation": "Read"
 }
]
- Set/Update ACLs
Modify and create ACLs
$ lenses-cli acl set \
    --resource-type="Topic" \
    --resource-name="transactions" \
    --principal="principalType:principalName" \
    --permission-type="Allow" \
    --acl-host="*" \
    --operation="Read"
ACLs can also be created from a file:
$ lenses-cli acl create ./file.yaml
- Delete ACLs
Delete ACLs
$ lenses-cli acl delete \
    --resource-type="Topic" \
    --resource-name="transactions" \
    --principal="principalType:principalName" \
    --permission-type="Allow" \
    --acl-host="*" \
    --operation="Read"
ACLs can also be deleted from a file:
$ lenses-cli acl delete ./file.yaml
file.yaml:
resourceType: Topic
resourceName: transactions
principal: principalType:principalName
permissionType: Allow
host: "*"
operation: Read
Note
Command line flags are ignored when loading from files.
Alerts
View all available alerts or modify and delete alert settings.
View all available Alerts:
$ lenses-cli alerts [--live]
Note
The --live flag, which is optional, displays real-time alert notifications.
View all Alert Settings:
$ lenses-cli alert settings
View an Alert Setting:
$ lenses-cli alert setting --id=2000 --output json
{
    "id": 2000,
    "description": "Consumer Lag exceeded",
    "category": "Consumers",
    "enabled": true,
    "docs": "Raises an alert when the consumer lag exceeds the threshold",
    "conditionTemplate": "lag >= $Threshold-Number on group $Consumer-Group and topic $Topic-Name",
    "conditionRegex": "lag >= ([1-9][0-9]*) on group (\\b\\S+\\b) and topic (\\b\\S+\\b)",
    "conditions": {
        "28bbad2b-69bb-4c01-8e37-28e2e7083aa9": "lag >= 100000 on group group and topic topicA",
        "4318a5a7-32e4-43af-9f3f-438e64d14a11": "lag >= 1000000 on group consumerA and topic topicA",
        "92dd89a1-83c0-4251-8610-36fce780a824": "lag >= 1000000 on group minikube.default.london-keyword-count and topic reddit_posts",
        "bdb01792-b79f-44d0-a39e-7f3e0906a89b": "lag >= 100000 on group connect-nullsink and topic topicA",
        "f4dd550f-bcb6-4e02-b28b-18bbd426aaf2": "lag >= 100000 on group groupA and topic topicA"
    },
    "isAvailable": true
}
Enable an Alert Setting:
$ lenses-cli alert setting --id=1000 --enable
View all conditions that belong to a specific Alert Setting:
$ lenses-cli alert setting conditions --alert=2000 --output json
{
    "28bbad2b-69bb-4c01-8e37-28e2e7083aa9": "lag >= 100000 on group group and topic topicA",
    "4318a5a7-32e4-43af-9f3f-438e64d14a11": "lag >= 1000000 on group consumerA and topic topicA",
    "7643d1ec-73f9-4913-95d1-87e62f1ec172": "lag >= 200000 on group groupA and topic topicA",
    "92dd89a1-83c0-4251-8610-36fce780a824": "lag >= 1000000 on group minikube.default.london-keyword-count and topic reddit_posts",
    "bdb01792-b79f-44d0-a39e-7f3e0906a89b": "lag >= 100000 on group connect-nullsink and topic topicA",
    "f4dd550f-bcb6-4e02-b28b-18bbd426aaf2": "lag >= 100000 on group groupA and topic topicA"
}
Create or update an existing condition for a specific Alert Setting:
$ lenses-cli alert setting condition set \
--alert=2000 \
--condition="lag >= 200000 on group groupA and topic topicA"
Update condition from a file:
$ lenses-cli alert setting condition set ./alert_cond.yaml
alert_cond.yaml:
alert: 2000
condition: >
  lag >= 200000 on group groupA and topic topicA
Note
Command line flags are ignored when loading from files
Delete an existing condition for a specific Alert Setting:
$ lenses-cli alert setting condition delete \
--alert=2000 \
--condition="7643d1ec-73f9-4913-95d1-87e62f1ec172"
Note
The value of the --alert flag is the Alert ID that the alert setting belongs to whereas the value of the --condition flag is the UUID of the condition to delete.
Audits
View audits:
$ lenses-cli audits [--live] [--with-content]
Note
The --live flag, which is optional, displays real-time audits. The --with-content flag includes the exact changes per action when table mode.
The below command will output all audits fields as JSON, like the rest of the commands that output a structured result:
$ lenses-cli audits --output json/table/yaml [--query] [--no-pretty]
Lenses Configuration
This command allows you to view the main configurations that Lenses exposes:
$ lenses-cli configs --output json # Or yaml
Example output:
{
...snip

"lenses.ip": "0.0.0.0",
"lenses.jmx.port": 24027,
"lenses.kafka.brokers": "SASL_PLAINTEXT://kafka1:19094,SASL_PLAINTEXT://kafka2:19094",
"lenses.kubernetes.config.file": "",
"lenses.kubernetes.processor.image.name": "domain.com/lenses-image",
"lenses.kubernetes.processor.image.tag": "2.3",
"lenses.kubernetes.service.account": "default",
"lenses.license.file": "license.json",
"lenses.port": 24017,
"lenses.root.path": "",
"lenses.security.mode": "BASIC",
"lenses.sql.execution.mode": "KUBERNETES",

...snip
}
To see the SQL processors deployment mode, you can inspect the
lenses.sql.execution.mode. For example, in CONNECT mode a cluster name is required and for
KUBERNETES an additional namespace is required to deploy processors.
$ lenses-cli mode
IN_PROC

$ lenses-cli configs mode
IN_PROC
- Get single entry config
Returns an individual config setting.
$ lenses-cli configs lenses.port
24017
Connectors
Create, modify, pause, restart and remove Apache Kafka Connect connectors.
- View Connectors
List currently deployed connectors, optionally filter by name, cluster and namespace:
# list connectors in the cluster dev
$ lenses-cli connectors --cluster-name="dev" [--output json/table/yaml [--query] [--no-pretty]] [--names [--unwrap]]
Note
The
--namesflag displays only the names of the connectors. When used with--unwrap, it will print each connector name on a separate line in the output.List all the supported Kafka Connectors instead of the currently deployed:
$ lenses-cli connectors --supported
- Plugins
View the available plugins per cluster or filter by cluster:
lenses-cli connectors plugins --cluster-name="dev"
- Create
Create connectors via the command line flags or file:
$ lenses-cli connector create --cluster-name="dev" --name="connectorName" --configs="{\"key\": \"value\"}"
From a file:
$ lenses-cli connector create ./connector.yaml
connector.yaml:
clusterName: development
config:
  connector.class: "org.apache.kafka.connect.file.FileStreamSinkConnector"
  file: "/dev/null"
  tasks.max: "1"
  topics: "reddit_posts"
  name: "nullsink"
Note
Command line flags are ignored when loading from files.
- Configs
View the configuration of a connector:
$ lenses-cli connector config --cluster-name="dev" --name="connectorName"
- Status
View the status of a connector:
$ lenses-cli connector status --cluster-name="dev" --name="connectorName"
- Pause
Pause a connector:
$ lenses-cli connector pause --cluster-name="dev" --name="connectorName"
- Resume
Resume a connector:
$ lenses-cli connector resume --cluster-name="dev" --name="connectorName"
- Restart
Restart a connector:
$ lenses-cli connector restart --cluster-name="dev" --name="connectorName"
- Restart a task
Restart a connector task:
$ lenses-cli connector task restart --task=0 --cluster-name="dev" --name="connectorName"
- View tasks
View tasks for a connector:
$ lenses-cli connector tasks --cluster-name="dev" --name="connectorName"
- Task status
View the status of a task for a connector:
$ lenses-cli connector task status --cluster-name="dev" --name="connectorName" --task=1
- Delete
Delete a connector:
$ lenses-cli connector delete --cluster-name="dev" --name="connectorName"
Exporting
The CLI allows you to export all resources in Lenses as requests so that they can be version controlled and imported into another environment.
Export operations are performed on a per resource basis, the directory structure is defined by the cli whereas a base directory can be provided using the --dir flag.
Processors, connectors, topics and schemas have an additional prefix flag to restrict resources to export.
lenses-cli export acls --dir my-dir
lenses-cli export alert-settings --dir my-dir
lenses-cli export connectors --dir my-dir
lenses-cli export processors --dir my-dir
lenses-cli export quota --dir my-dir
lenses-cli export schemas --dir my-dir
lenses-cli export topics --dir my-dir
lenses-cli export policies --dir my-dir
The directory structure is as follows:
<directory from flag>
├── alert-settings
│   └── alert-setting.yaml
├── apps
│   ├── connectors
│   │   ├── connector-1.yaml
│   │   └── connector-2.yaml
│   └── sql
├── kafka
│   ├── quotas
│   │   └── quotas.yaml
│   └── topics
│       ├── topic-1.yaml
│       └── topic-2.yaml
├── policies
│   └── policies-city.yaml
└── schemas
    ├── schema-1.yaml
    └── schema-2.yaml
Importing
The CLI allows you to import resources from files in Lenses into another environment.
Import is done on a per resource basis, the directory structure defined by the cli whereas a base directory can be provided by the --dir flag.
Processors, connectors, topics and schemas have an additional prefix flag to restrict resources to export.
lenses-cli import acls --dir my-dir
lenses-cli import alert-settings --dir my-dir
lenses-cli import connectors --dir my-dir
lenses-cli import processors --dir my-dir
lenses-cli import quota --dir my-dir
lenses-cli import schemas --dir my-dir
lenses-cli import topics --dir my-dir
lenses-cli import policies --dir my-dir
The directory structure is as follows:
<directory from flag>
├── alert-settings
│   └── alert-setting.yaml
├── apps
│   ├── connectors
│   │   ├── connector-1.yaml
│   │   └── connector-2.yaml
│   └── sql
├── kafka
│   ├── quotas
│   │   └── quotas.yaml
│   └── topics
│       ├── topic-1.yaml
│       └── topic-2.yaml
├── policies
│   └── policies-city.yaml
└── schemas
    ├── schema-1.yaml
    └── schema-2.yaml
Interactive Shell
The interactive shell allows you to have an interactive experience and issue Lenses SQL queries from the command line.
To start the interactive shell, issue the following command:
lenses-cli shell
The available options are the following:
keysprint message keyskeys-onlyprint the keys only, not the value of the messagemetaprint the message metadata, partition number and offsetsstatsprint query statistics as the last messageprettypretty print the JSON outputlive-streamrun in continuous query mode!optionsprints the current options
Options are set using the ! prefix.
Queries are executed by ;, multiline queries are possible but not available in the history inside the shell. After a restart, the multiline queries are concatenated into one line and can be selected.
Query history is stored in .lenes/history in the home directory of the user.
    __                                 ________    ____
   / /   ___  ____  ________  _____   / ____/ /   /  _/
  / /   / _ \/ __ \/ ___/ _ \/ ___/  / /   / /    / /
 / /___/  __/ / / (__  )  __(__  )  / /___/ /____/ /
/_____/\___/_/ /_/____/\___/____/   \____/_____/___/
Docs at https://docs.lenses.io
Connected to [https://master.lenses.io:443] as [andrew], context [master]
Use "!" to set output options [!keys|!keysOnly|!stats|!meta|!pretty]
Crtl+D to exit

lenses-sql>
Logs
View INFO logs
$ lenses-cli logs # or lenses-cli logs info.
View METRICS logs
$ lenses-cli logs metrics
Note
The --output flag will not result in a different output here because the logs are displayed as simple (colorful) text.
Data Policies
View data policies
$ lenses-cli policies
View a specific policy
$ lenses-cli policy view --name my-policy
Create a policy
Fields are set by suppling a comma separated string to the field flag.
$ lenses-cli policy create --name my-policy --category my-category --impact HIGH --redaction First-1 --fields f1,f2,f3

# from file
$ lenses-cli policy create --field f1,f2,f3 ./policy.yaml

$ cat policy.yaml
  name: my-policy
  category: my-category
  impactType: HIGH
  obfuscation: First-1
Update a policy
Fields are set by suppling a comma separated string to the field flag.
$ lenses-cli policy update --id my-policy-id --name my-policy --category my-category --impact HIGH --redaction First-1 --fields f1,f2,f3
Delete a policy
$ lenses-cli policy delete --id my-policy-id
Processors
The CLI can deploy and manage SQL processors deploy IN_PROC in Lenses or into Apache Kafka Connect or
Kubernetes via Lenses.
- View processors
View all processors registered, optionally filter by name, cluster and namespace.
$ lenses-cli processors
# filter by namespace
$ lenses-cli processors --namespace lenses-sql

# use the query flag to add further querying
$ lenses-cli processors --output table --query="[?ClusterName == 'IN_PROC'].Name | sort(@) | {Processor_Names_IN_PROC: join(', ', @)}"
- Create processors
Create processors from the command line flags or from a file. For
IN_PROCmode you only need the name, forCONNECTmode the name and cluster, forKUBERNETESmode all three:The following flags are valid for all
processoractions- –id (required if –name) is missing
- –name (required if –id is missing)
- –cluster-name (should be passed if KUBERNETES mode)
- –namespace (should be passed if KUBERNETES mode)
$ lenses-cli processor create \
    --name="processorName" \
    --runners=1 \
    --cluster-name="clusterName" \
    --namespace="ns" \
    --pipeline="prod" \
    --sql="SET autocreate=true;INSERT INTO topicB SELECT * FROM topic1"
From a file:
$ lenses-cli processor create ./processor.yaml
processor.yaml:
name: processorName
runners: 1
sql: >
  SET autocreate=true;INSERT INTO topicB SELECT * FROM topic1
Note
Command line flags are ignored when loading from files
- Pause a processor
Pause a running processor. For
IN_PROCmode you only need the name, forCONNECTmode the name and cluster, forKUBERNETESmode all three:$ lenses-cli processor pause --cluster-name="clusterName?" --namespace="namespace?" --name="processorName"
- Resume a processor
Resume a paused processor. For
IN_PROCmode you only need the name, forCONNECTmode the name and cluster, forKUBERNETESmode all three:$ lenses-cli processor resume --cluster-name="clusterName?" --namespace="namespace?" --name="processorName"
- Update a processor
Update a processor from the command line flags or file. For
IN_PROCmode you only need the name, forCONNECTmode the name and cluster, forKUBERNETESmode all three:$ lenses-cli processor update \ --cluster-name="clusterName?" \ --namespace="namespace" \ --name="processorName" \ --runners=2
From a file:
$ lenses-cli processor update ./processor.yaml
processor.yaml:
name: processorName
runners: 1
sql: >
  SET autocreate=true;INSERT INTO topicB SELECT * FROM topic1
Warning
You can not update the SQL, only the runners to scale up or down
- Delete a processor
Delete a processor by name, cluster and namespace. For
IN_PROCmode you only need the name, forCONNECTmode the name and cluster, forKUBERNETESmode all three.$ lenses-cli processor delete \ --namespace="namespace" \ --cluster-name="clusterName" \ --name="processorName
- View processors logs
Available only in KUBERNETES execution mode.
$ lenses-cli processors logs --cluster-name=clusterName --namespace=nameSpace --podName=runnerStateID [--follow --lines=50]
Query
The CLI allows you to browse and subscribe to topic data with SQL. Please refer to the Lenses SQL documentation for more details.
The data returned can be controlled via extra flags:
keysprint message keyskeys-onlyprint the keys only, not the value of the messagemetaprint the message metadata, partition number and offsetsstatsprint query statistics as the last message
- Browsing
Browse data via the
sqlcommand, optionally validate and output stats:$ lenses-cli query --keys --meta "SELECT score, author FROM reddit_posts LIMIT 50" # execute with stats every 2 seconds, show offsets at end $ lenses-cli query --stats "SELECT score, author FROM reddit_posts LIMIT 50"
- Live
Live continuous queries update according to the query and never stop until terminated:
$ lenses-cli query --live-stream "SELECT score, author FROM reddit_posts WHERE _sample=2 AND _sampleWindow=200"
Quotas
View, create, modify and delete quotas.
- View quotas
View all quotas:
$ lenses-cli quotas [--output json/table/yaml]
- Set quotas for users
Create and update quotas for users from command line flags or files:
$ lenses-cli quota users set [--quota-user="user"] [--quota-client=""] \
    --quota-config="{\"producer_byte_rate\": \"100000\",\"consumer_byte_rate\": \"200000\",\"request_percentage\": \"75\"}"
From a file:
$ lenses-cli quota users set ./quota.yamlquota.yaml:
# User name for a specific user quota.
# If empty or omitted then create/update the default user quota.
user: user
# All clients, it could be empty as well.
# Change it for a specific client.
clientID: "*"
config:
  ProducerByteRate: "100000"
  ConsumerByteRate: "200000"
  RequestPercentage: "75"
- Set quotas for clients
Create and update quotas for clients from command line flags or files:
$ lenses-cli quota clients set [--quota-client=""] \
    --quota-config="{\"producer_byte_rate\": \"100000\",\"consumer_byte_rate\": \"200000\",\"request_percentage\": \"75\"}"
From a file:
$ lenses-cli quota clients set ./quota-clients.yamlquota-clients.yaml:
# Default client quota, it could be empty or "all" as well.
# Change it for a specific client quota.
clientID: "*"
config:
  ProducerByteRate: "100000"
  ConsumerByteRate: "200000"
  RequestPercentage: "75"
- Delete for users
Delete quotas for users:
# --quota-user, optional. If empty then default user quota, otherwise specific user quota.
# --quota-client, optional. If empty or * then all clients, otherwise specific client.
# arguments, like producer_byte_rate, are not required.
#   Remove user quota config's specific properties, if empty then all properties will be passed on automatically
#   and the user quota will be removed entirely.
$ lenses-cli quota users delete [--quota-client=""] [--quota-user=""] \
    producer_byte_rate consumer_byte_rate request_percentage
# delete for the default user quota
$ lenses-cli quota users delete

# delete for a specific user quota
$ lenses-cli quota users delete \
    --quota-user="user"

# delete for a specific user and client
$ lenses-cli quota users delete \
    --quota-user="user" \
    --quota-client="clientID"

# delete for a specific user quota's property
$ lenses-cli quota users delete \
    --quota-user="user" \
    request_percentage
- Delete for clients
Delete quotas for clients:
# --quota-client, optional. If empty then default client quota, otherwise specific client quota.
# arguments, like producer_byte_rate, are not required.
#   Remove client quota config's specific properties, if empty then all properties will be passed on automatically
#   and the client quota will be removed entirely.
$ lenses-cli quota clients delete [--quota-client=""] \
    producer_byte_rate consumer_byte_rate request_percentage
# delete for the default client quota
$ lenses-cli quota clients delete

# delete for a specific client quota
$ lenses-cli quota clients delete \
    --quota-client="clientID"

# delete for a specific client quota's property
$ lenses-cli quota clients delete \
    --quota-client="clientID" \
    request_percentage
Schemas
View, modify and delete schemas and adjust compatibility levels.
- View all schemas
View the current schemas registered:
$ lenses-cli schemas --unwrap [--output json/table/yaml [--query] [--no-pretty]]
Note
The
--unwrapflag is optional, prints only the names separated by new line- View a schema
Schemas can be filtered by name:
$ lenses-cli schema --name="sea_vessel_position_reports-value"
- View schema versions
Schemas versions can be viewed filtered by name:
$ lenses-cli schema versions --name="sea_vessel_position_reports-value"
# view by version
$ lenses-cli schema --name="sea_vessel_position_reports-value" --version="latest"
- View schema compatibility levels
Schema compatibility levels can be viewed and filtered by name:
$ lenses-cli schema compatibility --name="register1
- Delete schemas
Delete all versions of a schema by name:
$ lenses-cli schema delete --name="coyote_test_02"
- Delete schemas by version
Delete a specific version of a schema:
# (defaults to "latest" if not passed)
$ lenses-cli schema delete-version --name="register1" --version=2
- Change compatibility of a Schema
Change the compatibility level of a schema:
$ lenses-cli schema compatibility set FULL --name="register1"
- Register a schema
Register a new schema for a name/subject by the command line or file:
$ lenses-cli schema register \
    --name="schemaName" \
    --avro="{ \"type\": \"string\" }"
Register by file:
$ lenses-cli schema register ./schema.yaml
schema.yaml:
name: schemaName
avroSchema: |-
  {
    "type": "record",
    "name": "evolution",
    "namespace": "com.landoop",
    "doc": "This is a sample AVRO schema to get you started. Please edxt",
    "fields": [
      {
       "name": "name",
       "type": "string"
      },
      {
       "name": "number1",
       "type": "int"
      },
      {
       "name": "number2",
       "type": "float"
      }
    ]
   }
Secrets
The secrets command looks up secrets stored in HashiCorp Vault (KV version 2), Azure KeyVault or the environment variable and creates
either a text file to source from a shell such as bash or a set of external secret files for Apache Kafka Connect.
This command is intended to be used in an Kubernetes init-container. The files can be mounted in a shared location and the main container in the pod can either source the files to create environment variables or reference them as a set of external secret files for Apache Kafka Connect.
The command has two modes, app and connect. Secret names are sourced from environment variables prefixed with SECRET_.
The value for the secrets is either looked up in HashiCorp Vault, Azure KeyVault or taken from the value of the environment variable.
Modes
- App mode
The app mode sources secrets from environment variables and creates a file that can be sourced in a shell. For example if you have an environment variable of
SECRET_MY_DATABASE_PASSORD=my-passwordthe following will be written to a file calledsecrets.export SECRET_MY_DATABASE_PASSORD=my-password
App mode can optionally create JSON or YAML files by setting the
--outputflag. Optionally variables can be sourced from a file by using the--from-fileflag.--from-file string File to variables load from instead of looking up as environment variables, separated by = --output string Output type, env for bash environment variables (source from secret-file), json or yaml (default "env") --secret-file string The secret file to write secrets to as key value pair (default "secrets")
- Connect mode
Connect mode creates three files for use with Apache Kafka Connect external secrets.
A
connector.propsfile that contains the nonsensitive connector properties. Environment variables with the prefixCONNECTOR_are lookup up and transformed to a Java properties format, lowercase and_converted to-. The prefix is removed.A
secret.propsfile that contains the sensitive connector properties. Environment variables with the prefixSECRET_are lookup up and transformed to a Java properties format, lowercase and_converted to-. The prefix is removed.A
worker.propsfile that contains the the Apache Kafka Connect worker properties. Environment variables with the prefixCONNECT_are lookup up and transformed to a Java properties format, lowercase and_converted to-. The prefix is removed.The Connect workers must be set to use the external file config provider. The CLI will add this as follows:
config.providers=file
config.providers.file.class=org.apache.kafka.common.config.provider.FileConfigProvider
The
connector.propswill contain a reference to thesecret.propsfile and a key in the secret file to lookup the value, for example:# connector.props connect.cassandra.password=${file:/secret.props:connect.cassandra.password} # secrets.props connect.cassandra.password: secret
Optionally variables can be sourced from a file by using the
--from-fileflag.--connector-file string The connector file to write connector config to (default "connector.props") --from-file string File to variables load from instead of looking up as environment variables, separated by = --secret-file string The secret file to write secrets to (default "secrets.props") --worker-file string The connect worker file to connect worker config to (default "worker.props")
Secret Value Lookup
- HashiCorp Vault
HashiCorp Vault KV backend is supported. Environment variables beginning with
SECRET_are translated to lowercase, with_changed to-. The prefix is stripped from the variable name and used as a key to look up the secret under the path supplied as the environment variable values.For example, if a secret was stored in Vault under secret/connectors/cassandra/connection1 with the key connect.cassandra.password and the value secret:
vault kv put secret/connectors/cassandra/connection1 connect-cassandra-password=secretThe CLI will look up the secret value if following environment variable is set:
SECRET_CONNECT_CASSANDRA_PASSWORD=/secret/data/connectors/cassandra/connection1
Vault mode requires a Vault service account or Kubernetes token and an AppRole. Please see the Vault documentation for further instructions setting this up.
--vault-role string     Vault appRole name
--vault-addr string     Vault server address
--vault-token string    Vault or kubernetes JWT token
Flags can also be set as environment variables,
VAULT_ADDR,VAULT_TOKENandVAULT_ROLE. Environment variables take precedence over the command line options. See the Vault Client for the full list.Note
HashiCorp Vault KV version 2 default mount path includes
datain the path.
Vault Example
In this example we will show how to export a secret from HashiCorp vault.
First let us configure vault by enabling the approle authentication, creating a policy and binding a new role to that policy.
# First, enable the ``approle`` authentication mechanism.
$ vault auth enable approle
  Success! Enabled approle auth method at: approle/

# Create our policy with name connectors
$ vault policy write connectors -<<EOF
  path "secret/data/lenses" {
    capabilities = ["read"]
  }
  EOF

  Success! Uploaded policy: connectors

# Create lenses approle and apply connectors policy to it
$ vault write auth/approle/role/lenses policies=connectors
  Success! Data written to: auth/approle/role/lenses
Next we show an example with the mandatory VAULT_VARS that lenses-cli requires in order to communicate with the vault.
export VAULT_ADDR="http://vault_host:vport"
export VAULT_TOKEN="Token"
export VAULT_ROLE="lenses"

# Check that you have access to vault
$ vault status
  Key             Value
  ---             -----
  Seal Type       shamir
  Initialized     true
  Sealed          false
  Total Shares    1
  Threshold       1
  Version         1.0.1
  Cluster Name    vault-cluster-7a134e7d
  Cluster ID      89bdb4a1-3340-7251-8e38-ec150c674e2d
  HA Enabled      false
In addition to the above environmental variables, lenses-cli secrets connect vault command will search our environment for any variable that starts with SECRET_. Given that it finds such a variable, it will proceed by extracting the string on the right, and create new variables as described below.
Note
As we will see later on, the cli also checks for environment variables that begin with CONNECT_ or WORKER_.
- Example key=value:
SECRET_SOME_VARIABLE=some_value - Vault key:
- Description: This is the secret key name inside the vault
- Transformation:
some-variable
- Vault path:
- Description: This is secrets engine path where
lenses-cliwill search for the key from above. - Transformation: None
- Description: This is secrets engine path where
- Connector key name:
- Description: Connector’s option
- Transformation: some.variable=
- Connector key value:
- Description: The value of the connector option. The value points to the file which hosts our key.
- Transformation (Vault form a secret key):
${file:secrets.props:some.variable} - Transformation (Value from a none secret key):
some_value
- Vault key:
The key value from above simply links the value that lenses-cli will pull from vault to a local file called secrets.props.
Next, let us create two new secrets to vault, export the SECRET_* variables to environment, and then use lenses-cli to pull these values.
# Create username & password secret entries
$ vault kv put /secret/lenses connect-influx-username=root connect-influx-password=root
  Key              Value
  ---              -----
  created_time     2019-02-17T19:50:37.874128038Z
  deletion_time    n/a
  destroyed        false
  version          1

# Export Username & Password Secret variable
export SECRET_CONNECT_INFLUX_USERNAME=/secret/data/lenses
export SECRET_CONNECT_INFLUX_PASSWORD=/secret/data/lenses

# Get Secrets from vault
$ lenses-cli secrets connect vault
  [INFO] 2019/02/18 00:45 Looking for secret environment variables
  [INFO] 2019/02/18 00:45 Found environment var [SECRET_CONNECT_INFLUX_PASSWORD=/secret/data/lenses]
  [INFO] 2019/02/18 00:45 Found environment var [SECRET_CONNECT_INFLUX_USERNAME=/secret/data/lenses]
  [INFO] 2019/02/18 00:45 Retrieving secret from server []. EnvVar: [SECRET_CONNECT_INFLUX_PASSWORD=/secret/data/lenses], Path: [/secret/data/lenses], Key: [connect-influx-password]
  [INFO] 2019/02/18 00:45 Found secret for EnvVar: [CONNECT_INFLUX_PASSWORD], Key: [connect-influx-password] in endpoint []
  [INFO] 2019/02/18 00:45 Retrieving secret from server []. EnvVar: [SECRET_CONNECT_INFLUX_USERNAME=/secret/data/lenses], Path: [/secret/data/lenses], Key: [connect-influx-username]
  [INFO] 2019/02/18 00:45 Found secret for EnvVar: [CONNECT_INFLUX_USERNAME], Key: [connect-influx-username] in endpoint []
  ...
  [INFO] 2019/02/18 00:45 Writing connector props to [connector.props]
  [INFO] 2019/02/18 00:45 Writing connector secrets props to [secrets.props]
- Our secrets have been pulled and two new files have been created:
- connector.props: Connect configuration file
- secrets.props: File which links secrets from
connector.propstosecrets.props
And of course below are the contents of each file:
# Connector.props content
$ cat connector.props
  connect.influx.password=${file:secrets.props:connect.influx.password}
  connect.influx.username=${file:secrets.props:connect.influx.username}

# Secrets.props content
$ cat secrets.props
  connect.influx.password=root
  connect.influx.username=root
Below we show a sample of the connector’s variables in the uppercase form. You can see that all variables start either with a CONNECTOR_ or SECRET_ prefix.
Lenses cli will ignore any variables that does not start with one of the above prefix strings.
...
export SECRET_CONNECT_INFLUX_PASSWORD=/secret/data/lenses
...
export CONNECTOR_NAME=influxdb_dev
...
export SECRET_CONNECT_INFLUX_USERNAME=/secret/data/lenses
...

$ lenses-cli secrets connect vault
  [INFO] 2019/02/19 23:51 Looking for secret environment variables
  [INFO] 2019/02/19 23:51 Found environment var [SECRET_CONNECT_INFLUX_PASSWORD=/secret/data/lenses]
  [INFO] 2019/02/19 23:51 Found environment var [SECRET_CONNECT_INFLUX_USERNAME=/secret/data/lenses]
  ...
  ...
  [INFO] 2019/02/19 23:51 Writing connector secrets props to [secrets.props]


# Connector.props
$ cat connector.props
  ...
  name=influxdb_dev
  ...
  connect.influx.password=${file:secrets.props:connect.influx.password}
  connect.influx.username=${file:secrets.props:connect.influx.username}
  ...

  # Secrets.props
  $ cat secrets.props
    connect.influx.password=root
    connect.influx.username=root
To create the connector, run connect-cli as shown below.
$ connect-cli create influxdb_dev <connector.props
  Validating connector properties before posting
  Connector properties valid. Creating connector influxdb_dev
  #Connector `influxdb_dev`:
  ...
  connect.influx.password=****
  ...
  connect.influx.username=${file:secrets.props:connect.influx.username}
  ...
  #task ids: 0; 1

# List all available connectors
$ lenses-cli connectors --cluster-name=dev
  CLUSTER (4)    NAME            CONFIGS   TASKS
 -------------- --------------- --------- -------
  ...
  dev            influxdb_dev         19       2
  ...

# Check the status of influxdb_dev connector
$ lenses-cli connector --name=influxdb_dev --cluster-name=dev
  CLUSTER   NAME           CONFIGS   TASKS
 --------- -------------- --------- -------
  dev       influxdb_dev        19       2
- Azure
Azure KeyVault is supported. Environment variables beginning with
SECRET_are translated to lowercase, with_changed to-. The prefix is stripped from the variable name and used as the secret name to lookup in the key vault.For example, if a secret was stored in Azure KeyVault with the key connect-cassandra-password and the value secret
az keyvault secret set --vault-name 'lenses-vault' --name 'connect-cassandra-password' --value 'secret'
The CLI will look up the secret value if following environment variable is set:
SECRET_CONNECT_CASSANDRA_PASSWORD=connect-cassandra-password
In Azure mode, service principal credentials, key vault name and optional a key vault dns prefix are required. The service principal must have read access to the key vault.
--client-id string       Azure client id
--client-secret string   Azure client secret id
--dns-suffix string      Azure key vault dns suffix (default "https://vault.azure.net")
--tenant-id string       Azure tenant id
--vault-name string      Azure key vault name
Flags can also be set as environment variables, AZURE_CLIENT_ID, AZURE_CLIENT_SECRET, AZURE_TENANT_ID, AZURE_KEY_VAULT and AZURE_KEY_VAULT_DNS. Environment variables take precedence over the command line options.
- Env mode
The env mode sources secrets from environment variables and creates a file that can be sourced in a shell. For example if you have an environment variable of
SECRET_CONNECT_MY_DATABASE_PASSORD=my-passwordthe following will be written to a file calledsecrets.export SECRET_CONNECT_MY_DATABASE_PASSORD=my-password
Env mode can optionally create JSON or YAML files by setting the
--outputflag. Optionally variables can be sourced from a file by using the--from-fileflag.
General Examples
# Create external secret files from Vault for Connect
secrets connect vault --vault-role lenses --vault-token XYZ --vault-addr http://127.0.0.1:8200
secrets connect vault --vault-role lenses --vault-token XYZ --vault-addr http://127.0.0.1:8200 --from-file my-env.txt

# Create external secret files from Azure for Connect
secrets connect azure --vault-name lenses --client-id xxxx --client-secret xxxx --tenant-id xxxxx
secrets connect azure --vault-name lenses --client-id xxxx --client-secret xxxx --tenant-id xxxxx -from-file my-env.txt

# Create external secret files from Vault for an app
secrets app vault --vault-role lenses --vault-token XYZ --vault-addr http://127.0.0.1:8200
# Create external secret files from Vault for an app as YAML
secrets app connect vault --vault-role lenses --vault-token XYZ --vault-addr http://127.0.0.1:8200 --output yaml

# Create external secret files from Azure for an app
secrets app azure --vault-name lenses --client-id xxxx --client-secret xxxx --tenant-id xxxxx
secrets app azure --vault-name lenses --client-id xxxx --client-secret xxxx --tenant-id xxxxx -from-file my-env.txt
Warning
The CLI is not checking if the variables are secret or not. If you set a sensitive secret with the prefix CONNECTOR
or CONNECT is will be written directly to the connector.props or worker.props files.
Topics
View, create and modify topics:
- View topics
View all topics.
$ lenses-cli topics [--names [--unwrap]]
Note
The optional
namesflag wil display only the names of the topics, and if--unwrapthen each topic name will be displayed on a new line as a simple text- View a topic
View a specific topic:
$ lenses-cli topic --name=reddit_posts- Update configs
Update a topic configuration:
$ lenses-cli topic update \
    --name="topic2" \
    --configs="[{\"key\": \"max.message.bytes\", \"value\": \"1000020\"}]"
Update from a file:
$ lenses-cli topic update ./topic.yaml
topic.yml:
name: topicName
replication: 1
partitions: 1
configs:
  max.message.bytes: "1000010"
Note
Command line flags are ignored when loading from files
- Create topics
Create topics from the command line or files. If no replication, partitions or configuration is specific the broker defaults are used:
$ lenses-cli topic create \
    --name="topicName" \
    --replication=1 \
    --partitions=1 \
    --configs="{\"max.message.bytes\": \"1000010\"}"
For a file:
$ lenses-cli topic create ./topic.yml
topic.yml:
name: topicName
replication: 1
partitions: 1
configs:
  max.message.bytes: "1000010"
- Delete topics
Delete topics by name:
$ lenses-cli topic delete --name="topic2"
User Profile
List information about the authenticated logged user, such as the given roles given by the lenses administrator:
$ lenses-cli user
List user favorites:
$ lenses-cli user profile [--silent]
Delete a value from a user profile property:
$ lenses-cli user profile delete existingProperty existingValueFromProperty [--silent]
Set a value to a user profile property:
$ lenses-cli user profile set newProperty newValueToTheProperty [--silent]
Troubleshooting
For troubleshooting or additional information join our slack channel.