Azure AD Integration
Azure AD supports the LDAPS protocol, and it can be used in Lenses as an authentication provider. Since the authentication is deferred, this means users are stored in Azure AD and not Lenses. Once the authentication is successful, the next step involves querying Azure AD for the user’s groups.
Azure AD
Azure Active Directory Domain Services (Azure AD DS) provides managed domain services such as domain join, group policy, LDAP, Kerberos/NTLM authentication that is fully compatible with Windows Server Active Directory. You consume these domain services without deploying, managing, and patching domain controllers yourself. Azure AD DS integrates with your existing Azure AD tenant. This integration lets users sign in using their corporate credentials, and you can use existing groups and user accounts to secure access to resources.
Create Azure AD Domain Instance
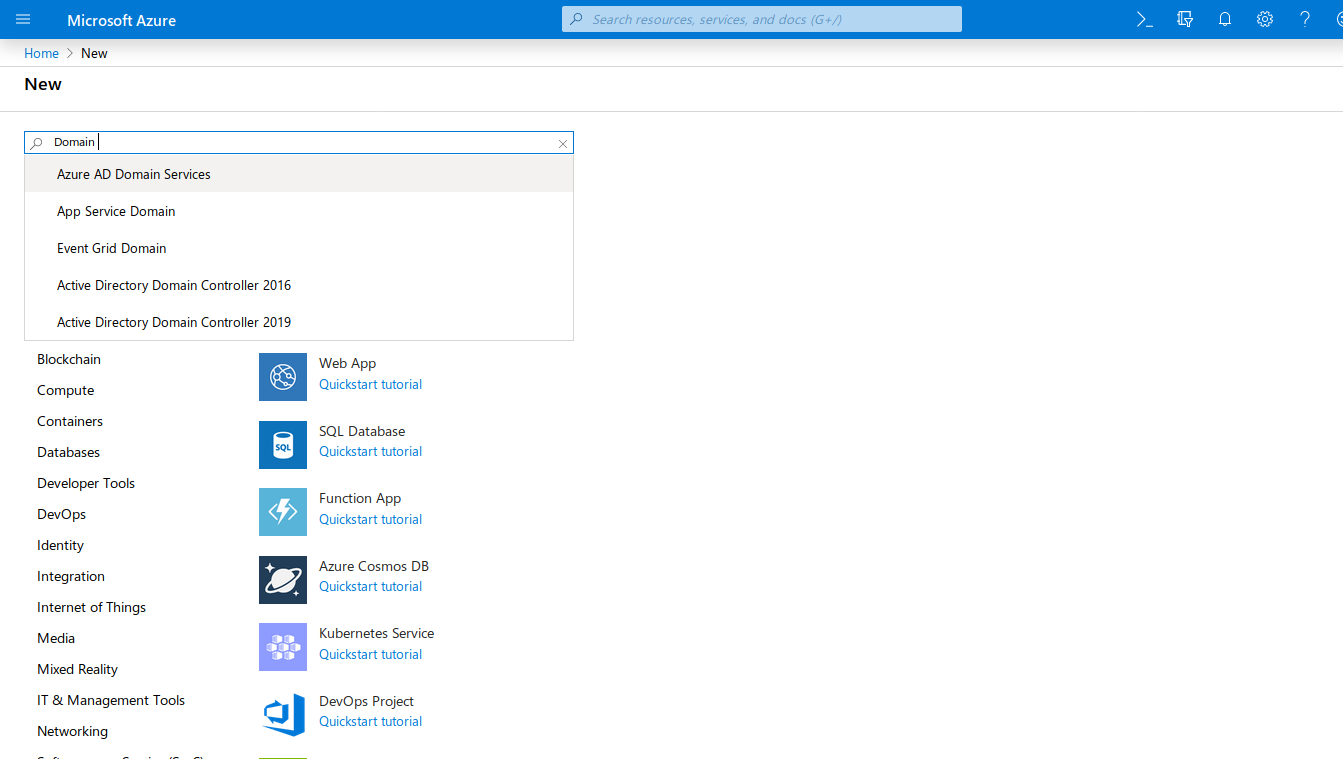
Using the Azure portal chose to create a resource. Enter Domain service in the search bar, and then select Azure AD Domain Services from the options given.
Fill the DNS Domain Name with the same one you have with for your existing Azure AD tenant:

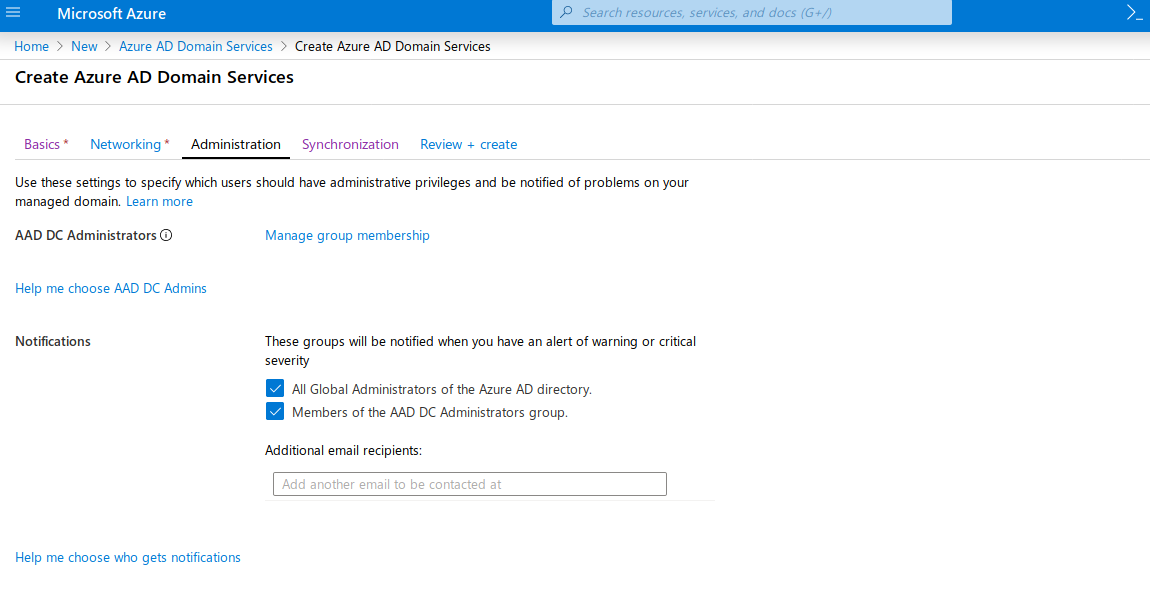
- Using the Administration tab you can manage the group membership for the AAD DC Administrator
- to control the members who will have full right access for Azure AD.
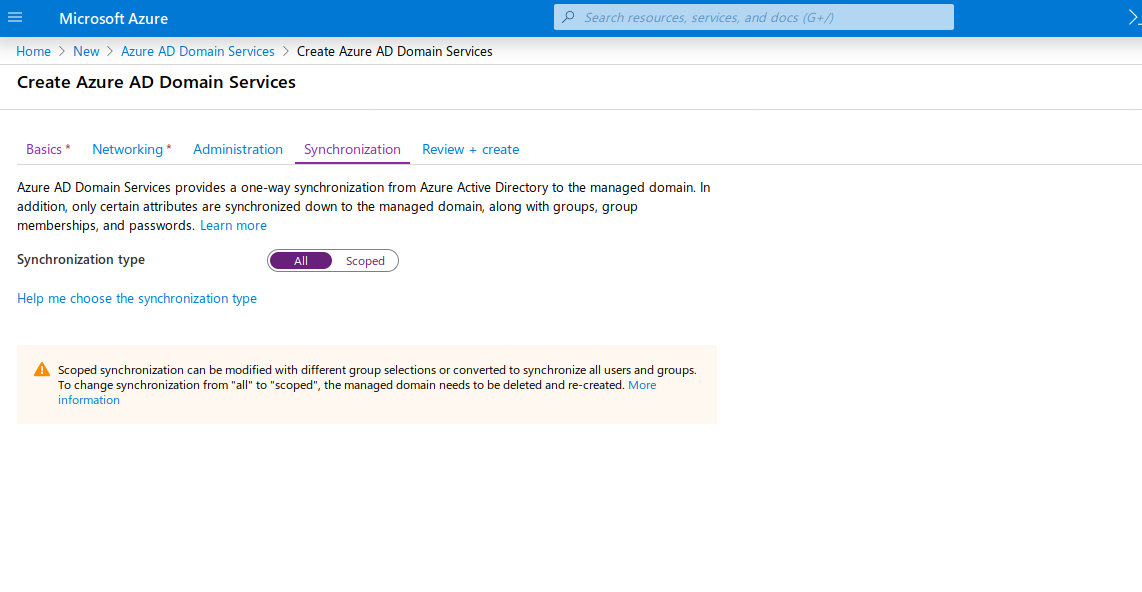
Azure AD Domain Services provides a one-way synchronization from Azure Active Directory to the managed domain. Also, only certain attributes are synchronized down to the managed domain, along with groups, group memberships, and password. The Synchronization tab provides two options. The first one is All, which means everything will be synchronized to Azure AD DS managed domain. And the second one is Scoped, which allows selecting specific groups to be synced.
 Create Azure AD Domain Instance
After this, just review and create the Azure AD Managed domain.
Configure DNS server settings
Once the managed domain is ready to be used, then the DNS server settings for the Azure Virtual Network need to be configured. Click the button configure as the following image shows:
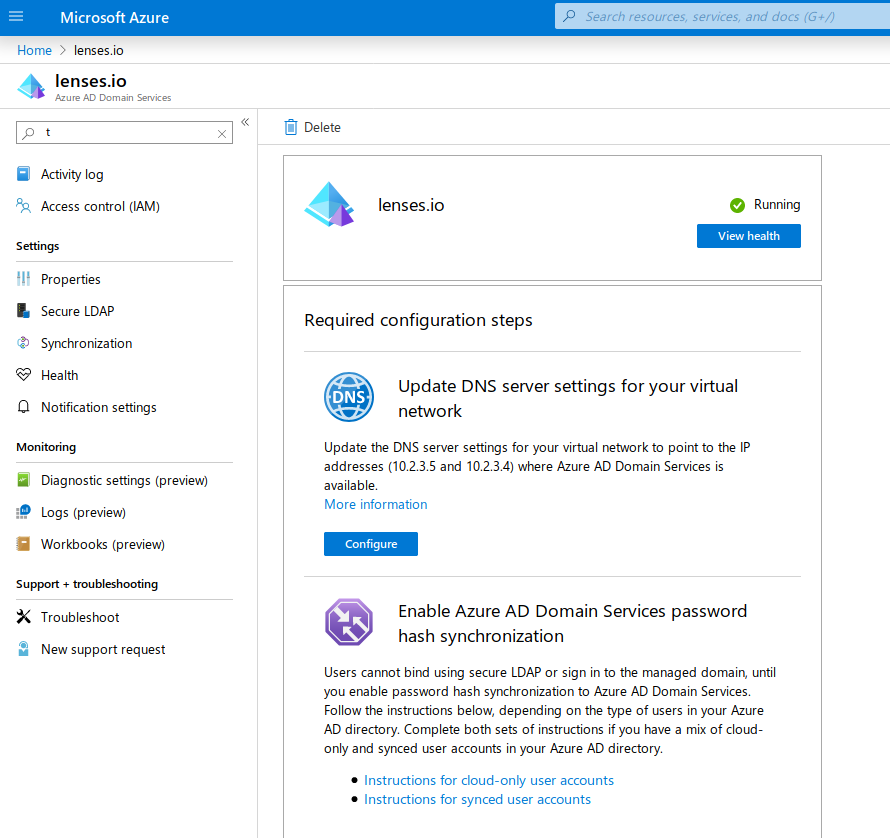
For the DNS changes to be applied, all the VMs are required to be restarted.
Azure AD DS needs password hashes in a format that’s suitable for NT LAN Manager (NTLM) and Kerberos authentication. Azure AD doesn’t generate or store password hashes in the format that’s required for NTLM or Kerberos authentication until you enable Azure AD DS for your tenant. For security reasons, Azure AD doesn’t store any password credentials in clear-text form. Therefore, Azure AD can’t automatically generate these NTLM or Kerberos password hashes based on users’ existing credentials.
Read the details here by Microsoft to generate these for your existing users.
Virtual Network Peering
The Virtual Network to deploy Lenses to needs to enable Virtual Network Peering. This allows it to communicate with Azure AD DS. You should add the IPs which has been generated by the previous step as DNS Servers.
Read the details here
Enable Secure LDAP
To enable the LDAP(S) protocol on Azure AD DS, use the following PowerShell to generate the self-signed certificate:
# Define your DNS name used by your Azure AD DS managed domain
$dnsName="contoso.com"

# Get the current date to set a one-year expiration
$lifetime=Get-Date

# Create a self-signed certificate for use with Azure AD DS
New-SelfSignedCertificate -Subject *.$dnsName
  `-NotAfter $lifetime.AddDays(365) -KeyUsage DigitalSignature, KeyEncipherment `
  -Type SSLServerAuthentication -DnsName *.$dnsName, $dnsName
In case PowerShell is not available, using openssl command is an option. This script here generates a certificate for Azure AD DS.
DOMAIN="lenses.io" COUNTRY=US STATE=California ORGANIZATION="Lenses.io Ltd" ./create-certs.sh

# export certificate in PFX
openssl pkcs12 -export -name "<your-ad-domain>" -out openssl.pfx -inkey tls/my-service.key -in tls/my-service.crt
Use the Secure LDAP tab to upload the PFX certificate. Make sure the option Allow secure LDAP access over the Internet is enabled.
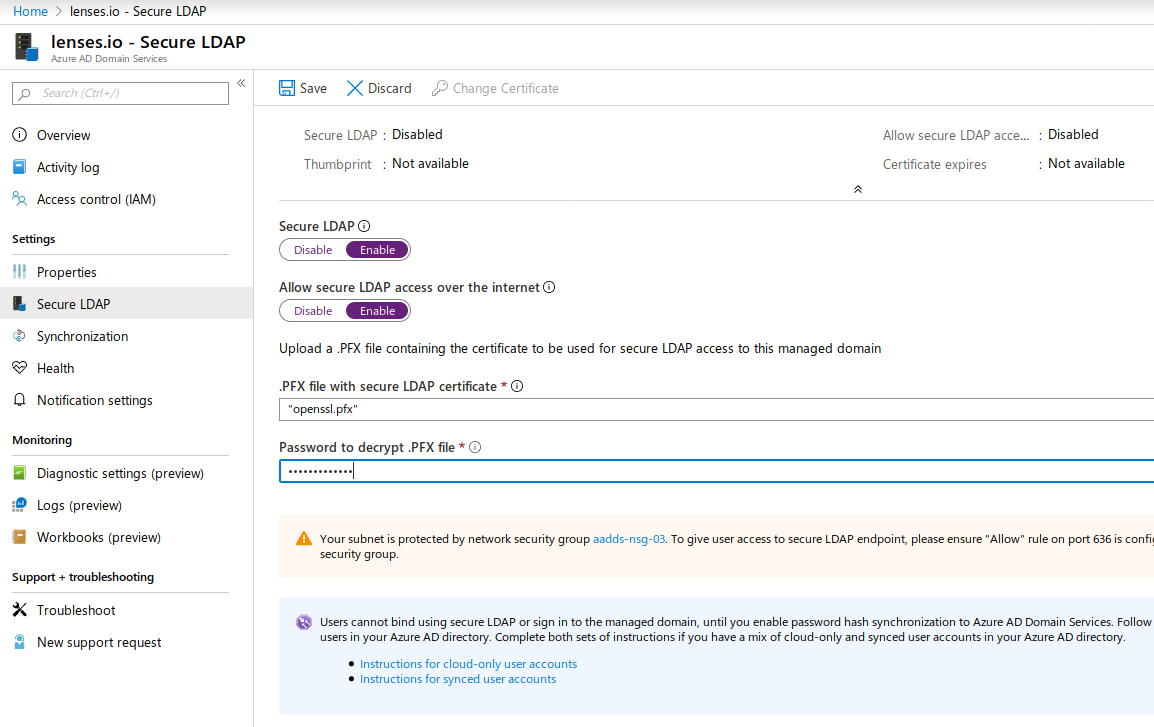
After the secure LDAP is enabled and allows secure LDAP access, Azure AD DS properties contain the IP address used to expose the LDAP service.
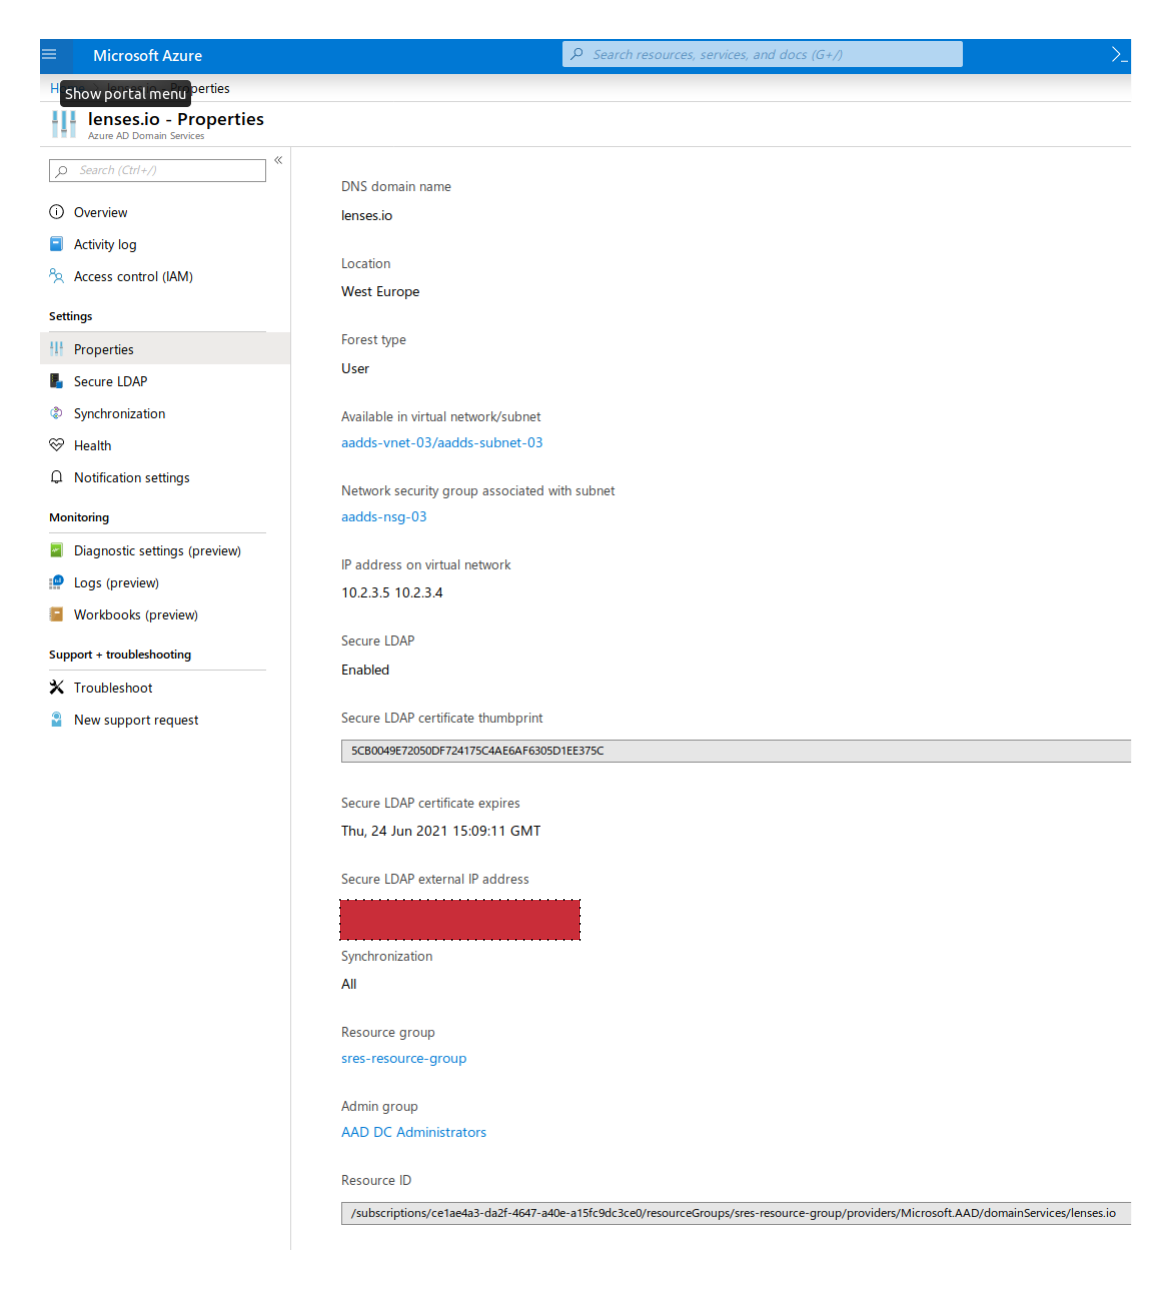
Add the following to the /etc/hosts file on the virtual machine or the edge node in HDInsight cluster you want to communicate with.
<secure.ldap.ip> ldaps.<your-ad-ds-domain>

# example

50.149.72.230 ldaps.lenses.io
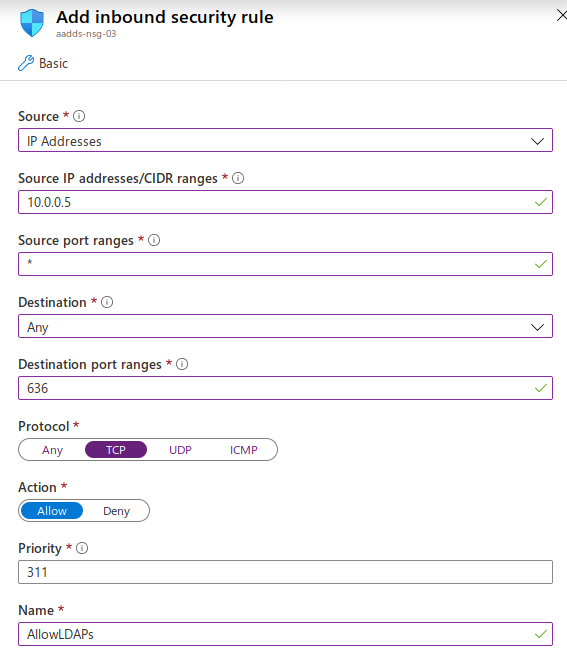
Finally, you need to allow inbound traffic to the Azure AD DS network security group for the LDAPS port 636 and limit the access only to he the virtual machine or the range of the IPs which they should have inbound access.
Lenses LDAP Configuration
Create a user in your Azure AD who can have admin access to fetch groups and users. Here is a sample Lenses configuration:
lenses.security.ldap.url="ldaps://ldaps.lenses.io:636"
lenses.security.ldap.user="svctest@lenses.io"
lenses.security.ldap.password="<your-svc-password>"

lenses.security.ldap.base="ou=AADDC Users,dc=lenses,dc=io"
lenses.security.ldap.filter="(&(objectClass=person)(sAMAccountName=<user>))"

lenses.security.ldap.plugin.class="io.lenses.security.ldap.LdapMemberOfUserGroupPlugin"
lenses.security.ldap.plugin.group.extract.regex="(?i)CN=(\\w+),ou=AADDC Users.*"
lenses.security.ldap.plugin.memberof.key="memberOf"
lenses.security.ldap.plugin.person.name.key = "sn"