4.3
AWS MSK
Lenses.io is an advanced Amazon MSK integration offering
data observability, productivity, monitoring, security and governance
for Apache Kafka and event/streaming applications.

If you have an AWS MSK cluster, you can quickly install using

Learn more
Read bellow to learn more about
- Secure AWS installation with IAM Role Delegation
- Marketplace installation
- How to enable MSK Open Monitoring
- How to connect with SSH to Lenses Instance
- Persistent Storage Options
AWS Marketplace
Note down the Cluster ARN and Security group:

1) Select CloudFormation Template, Lenses EC2 MSK and your region

2) Choose Launch CloudFormation

3) Continue with the default options for creating the stack in the AWS wizard.
At the Specify stack details, enter the following:
- Name for your Lenses deployment at the top
- InstanceType - Recommended t2.large
- LensesLocation - 0.0.0.0/0
- Lenses license - the contents of the JSON license file
- AWS MSK ARN - From AWS MSK Console
- AWS Cluster Security Group - From AWS MSK Console
- Enable CloudWatch metrics
Optionally set the Connect and Schema Registry configurations if you have them installed.
Note: Ensure you select the subnets.

4) Review the stack:

5) Accept the terms and conditions and create the stack:

6) Once the stack has deployed, go to the Output tab and click on the FQDN link:

7) Login to Lenses with admin/ec2-instance-name for versions up to and including 4.3.4.
For version 4.3.6, login using the password value you have submitted on paramater LensesAdminPassword.
You can find the instance name in the resources tab of the Cloud Formation stack:

Template policies
The template enables the following policies:
logs:CreateLogGrouplogs:CreateLogStreamlogs:PutLogEventskafka:Describe*kafka:List*logs:PutLogEventsacm-pca:IssueCertificateacm-pca:GetCertificate
Template options
Parameter
LensesAdminPasswordwas introduced in version4.3.6. For previous versions, default initial password was the EC2 instance name.
| Field | Description | Type | Required |
|---|---|---|---|
LensesLicense | The Lenses license | string | yes |
LensesAdminPassword | The admin user password | string | yes |
MSKClusterARN | The generated MSK Cluster ARN | string | yes |
MSKSecurityGroup | The MSK security group in order to allow all traffic as inbound traffic to Lenses | string | no |
SchemaRegistryURLs | A list of Schema Registry nodes | array | no |
ConnectURLs | A list of all the Kafka Connect clusters | array | no |
Persistence Storage options
| Field | Description | Type | Required |
|---|---|---|---|
LensesStorage | The Lenses Storage Mode - either local or postgres default local | string | yes |
StoragePostgresHostname | (Required if storage is postgres) Postgres Hostname | string | no |
StoragePostgresUsername | (Required if storage is postgres) Postgres Username | string | no |
StoragePostgresPassword | Required if storage is postgres) Postgres Password | string | no |
StoragePostgresDatabase | (Required if storage is postgres) Postgres Database Name | string | no |
In-order to do in-place Lenses version upgrades, by downloading Linux binary from
Lenses Archive
, and you are using storage mode local it is suggested first to do an H2 database backup as in the following article:
https://help.lenses.io/using-lenses/basics/backup
Connect with SSH to EC2 Instance
Since version 4.3.6, parameter SSHLocation has been deprecated and port 22 is no longer allowed as an Inbound rule, on the Lenses security group.
This is in sync with AWS Marketplace security recommendations, since most users would leave the default allow rule of 0.0.0.0/0, which is a known security risk.
However, to be able to connect with SSH to the instance, you can apply the following workaround step-by-step guide, that utilizes EC2 Instance Connect browser feature:
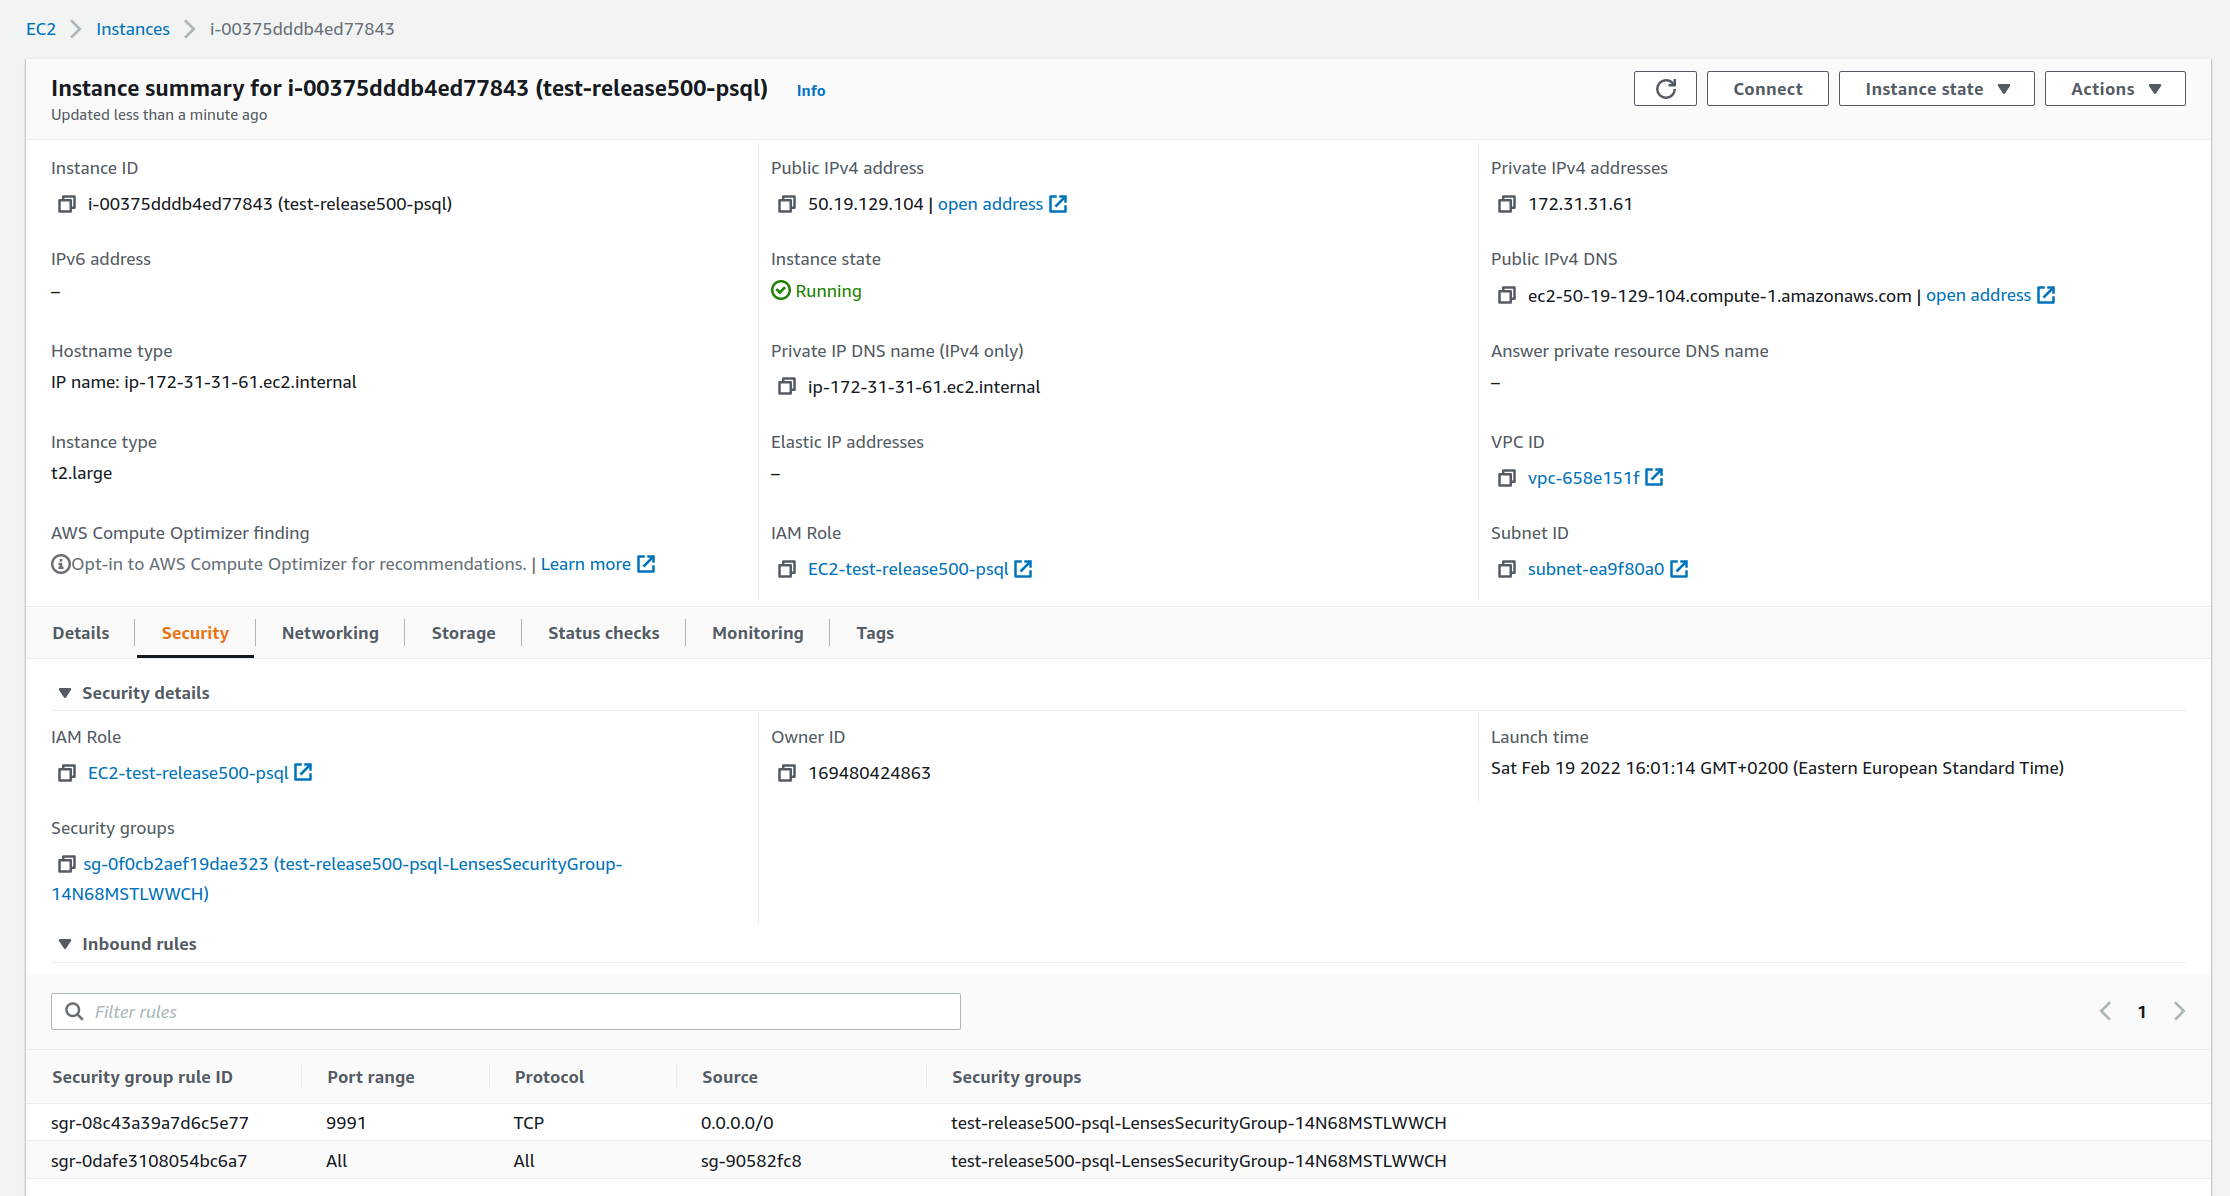
1) Find your cloudformation stack and open the stack resources menu
 |
|---|
 |
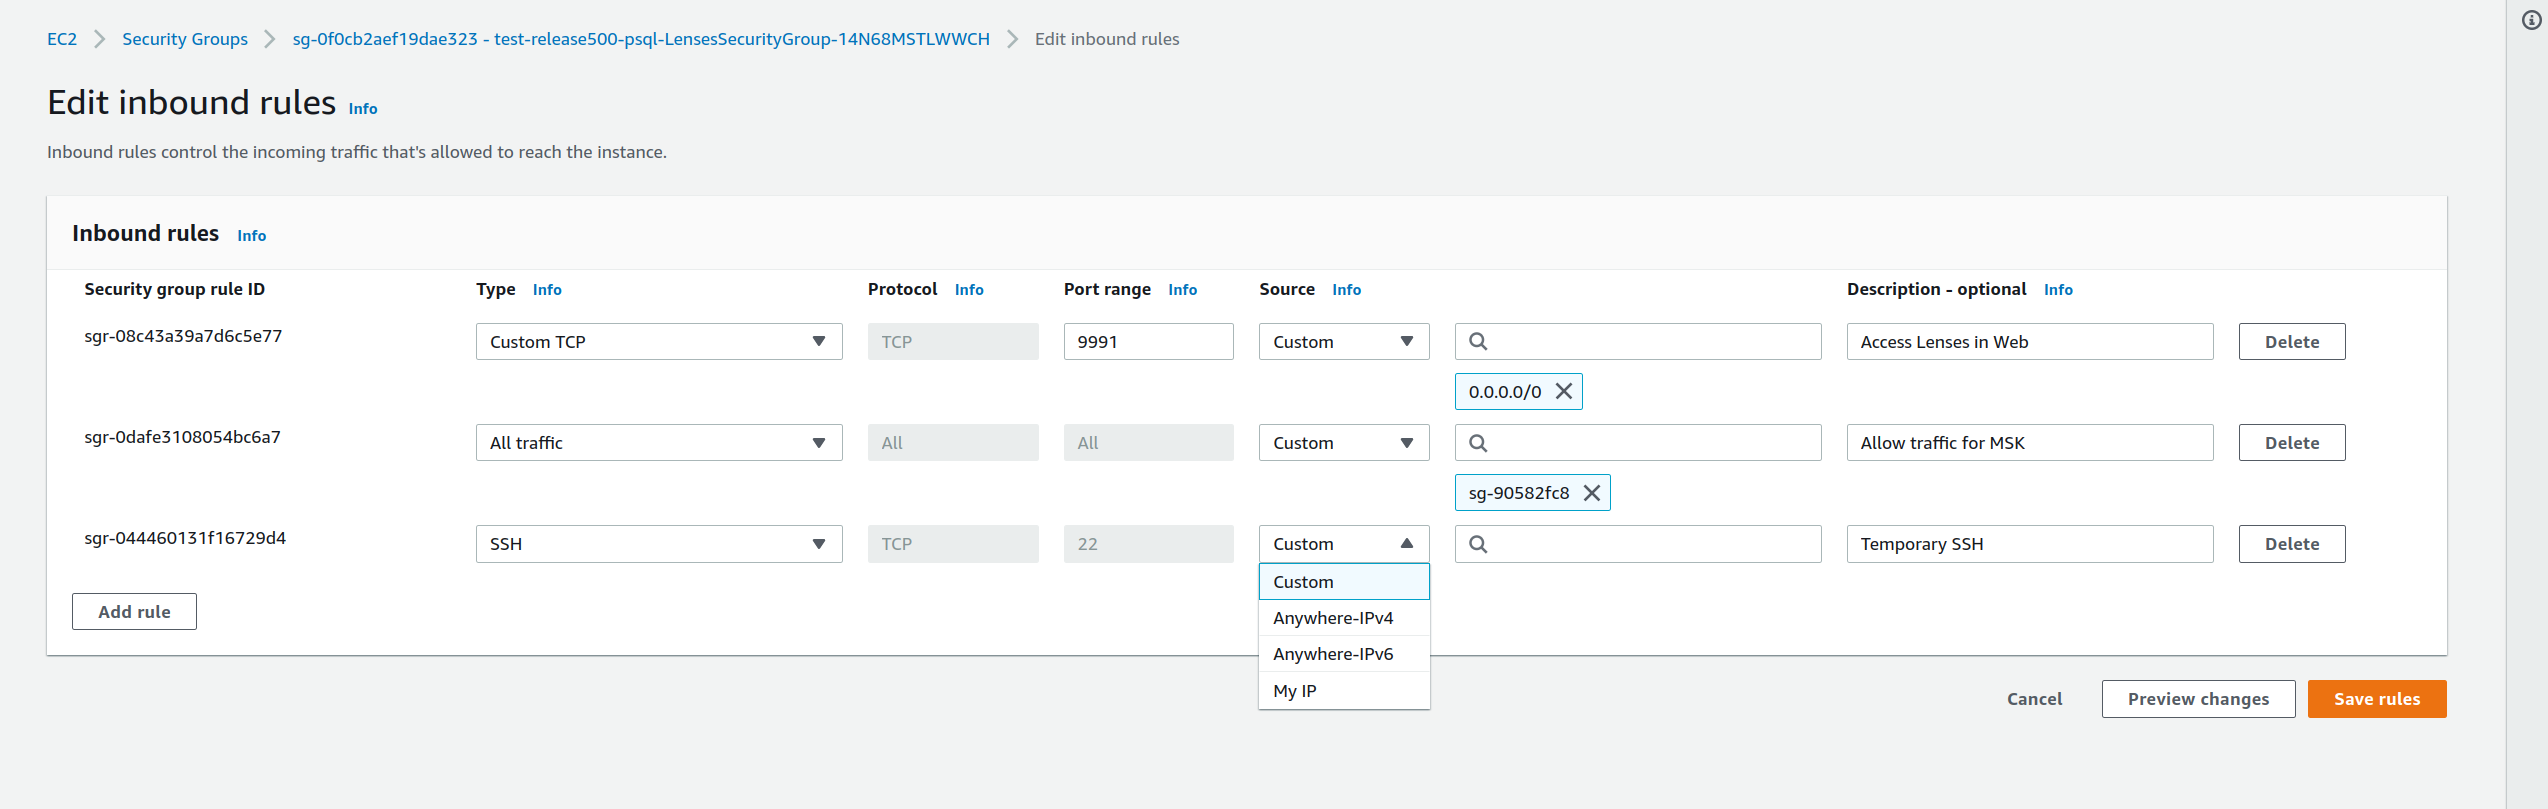
2) From there you can find the Lenses Instance details and on the Security tab, go to the Lenses Security group to Edit inbound rules.
 |
|---|
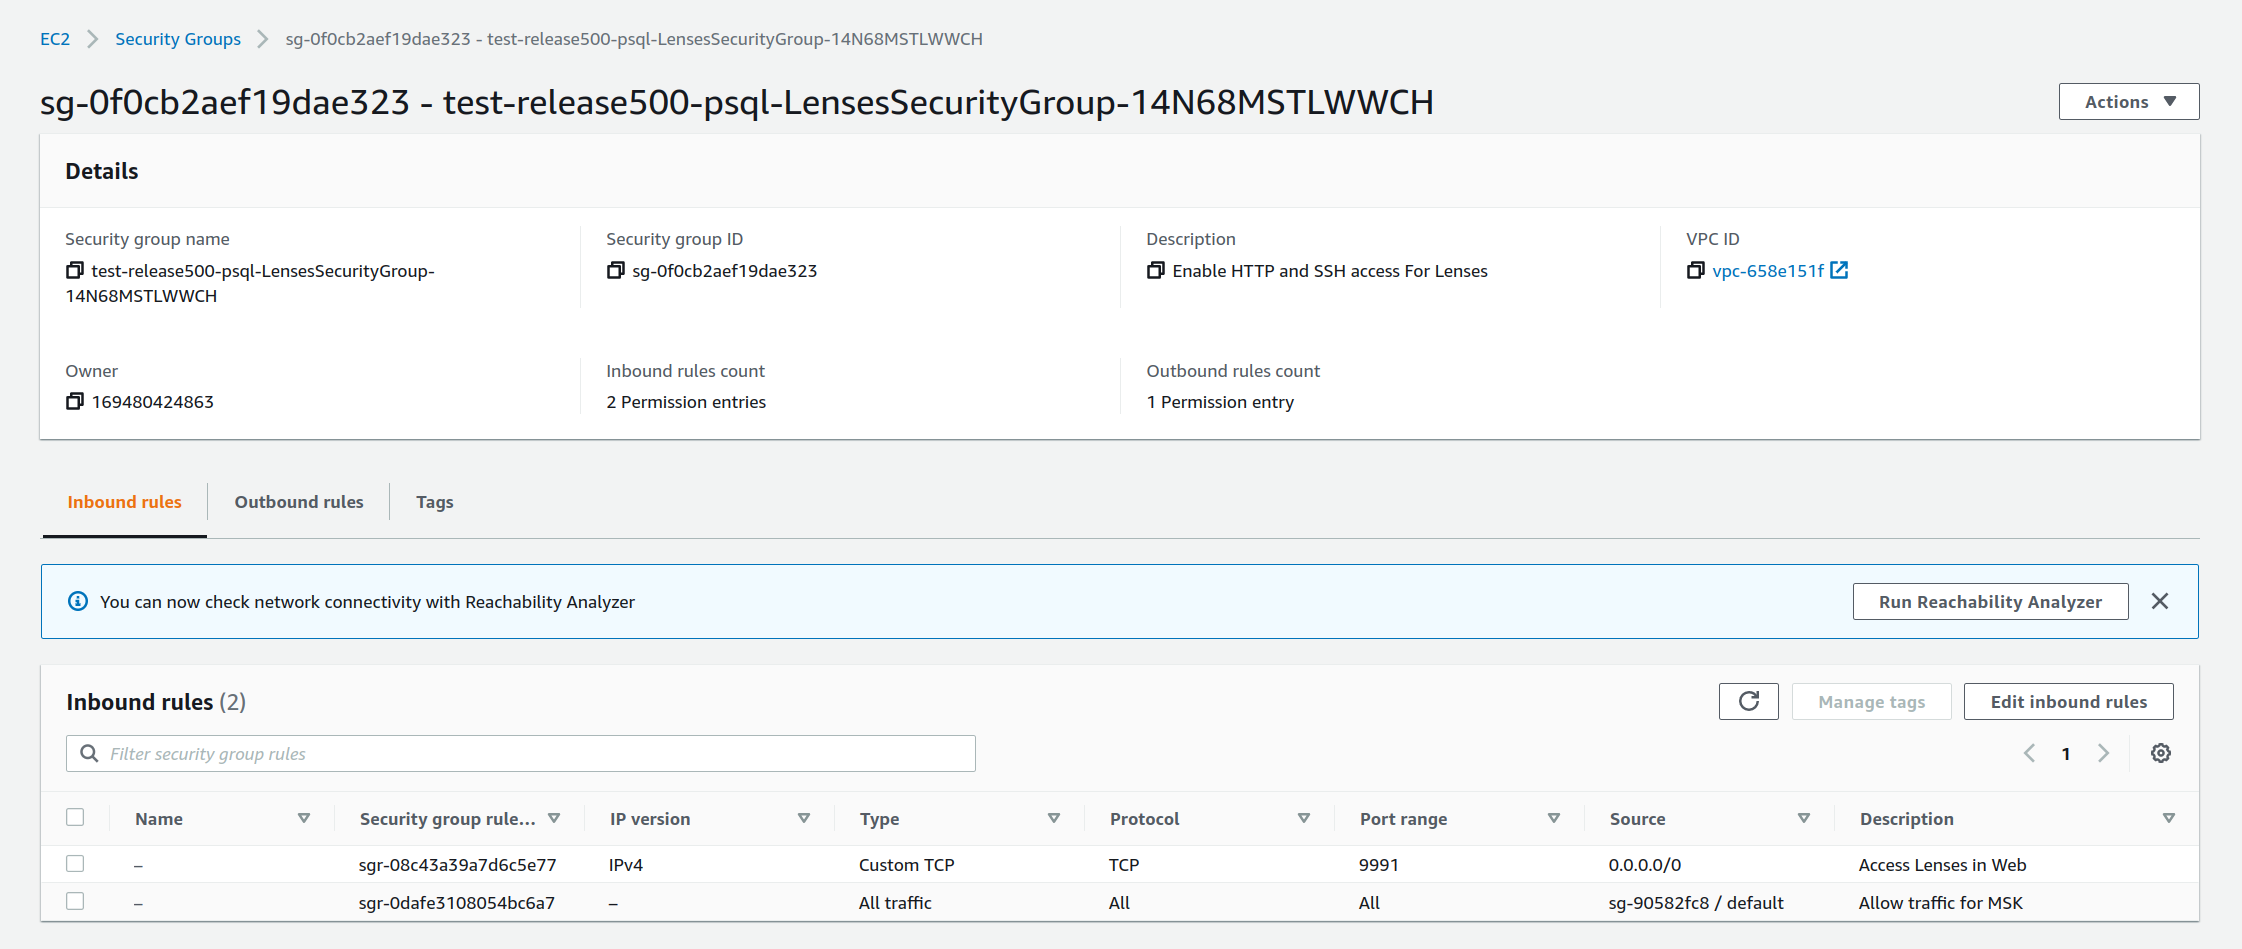 |
3) Add a temporary SSH allow rule with type SSH, for All Ipv4 addresses and Save. This is a pre-requisite for EC2 Instance Connect feature.
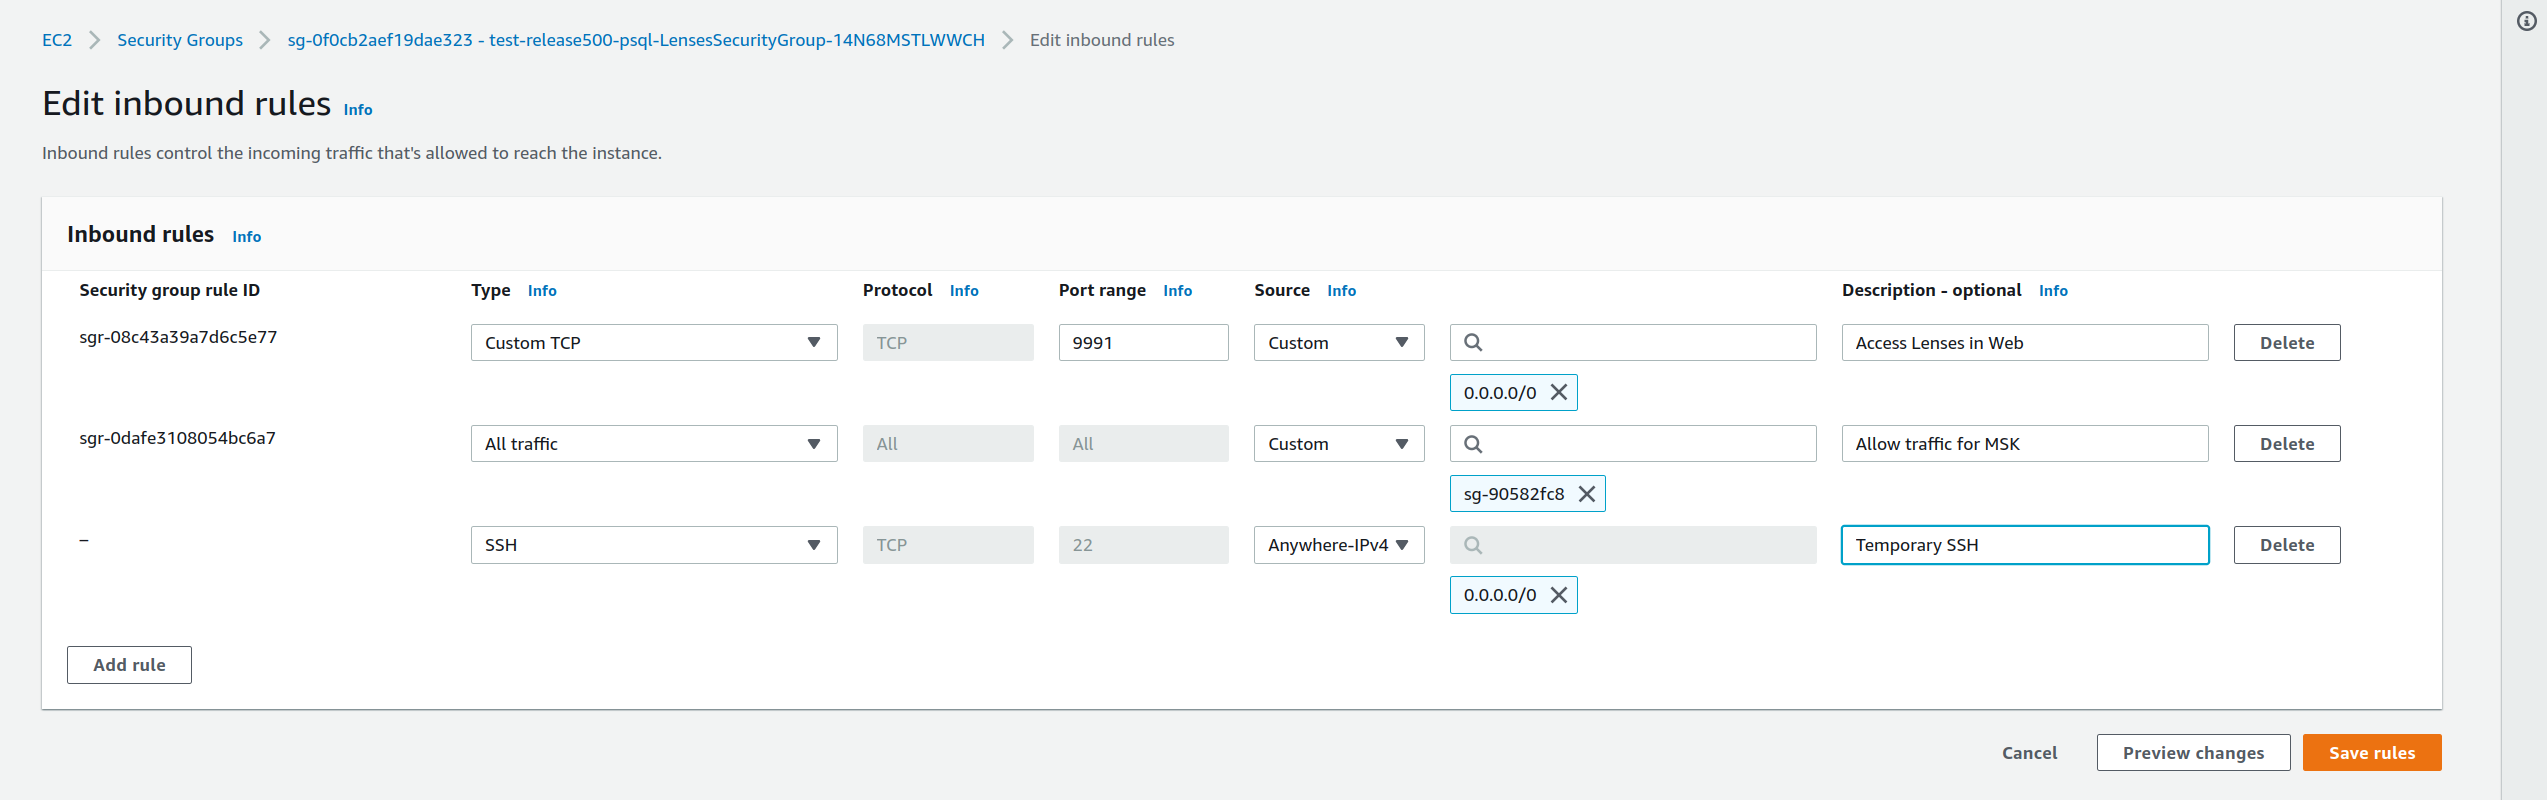 |
|---|
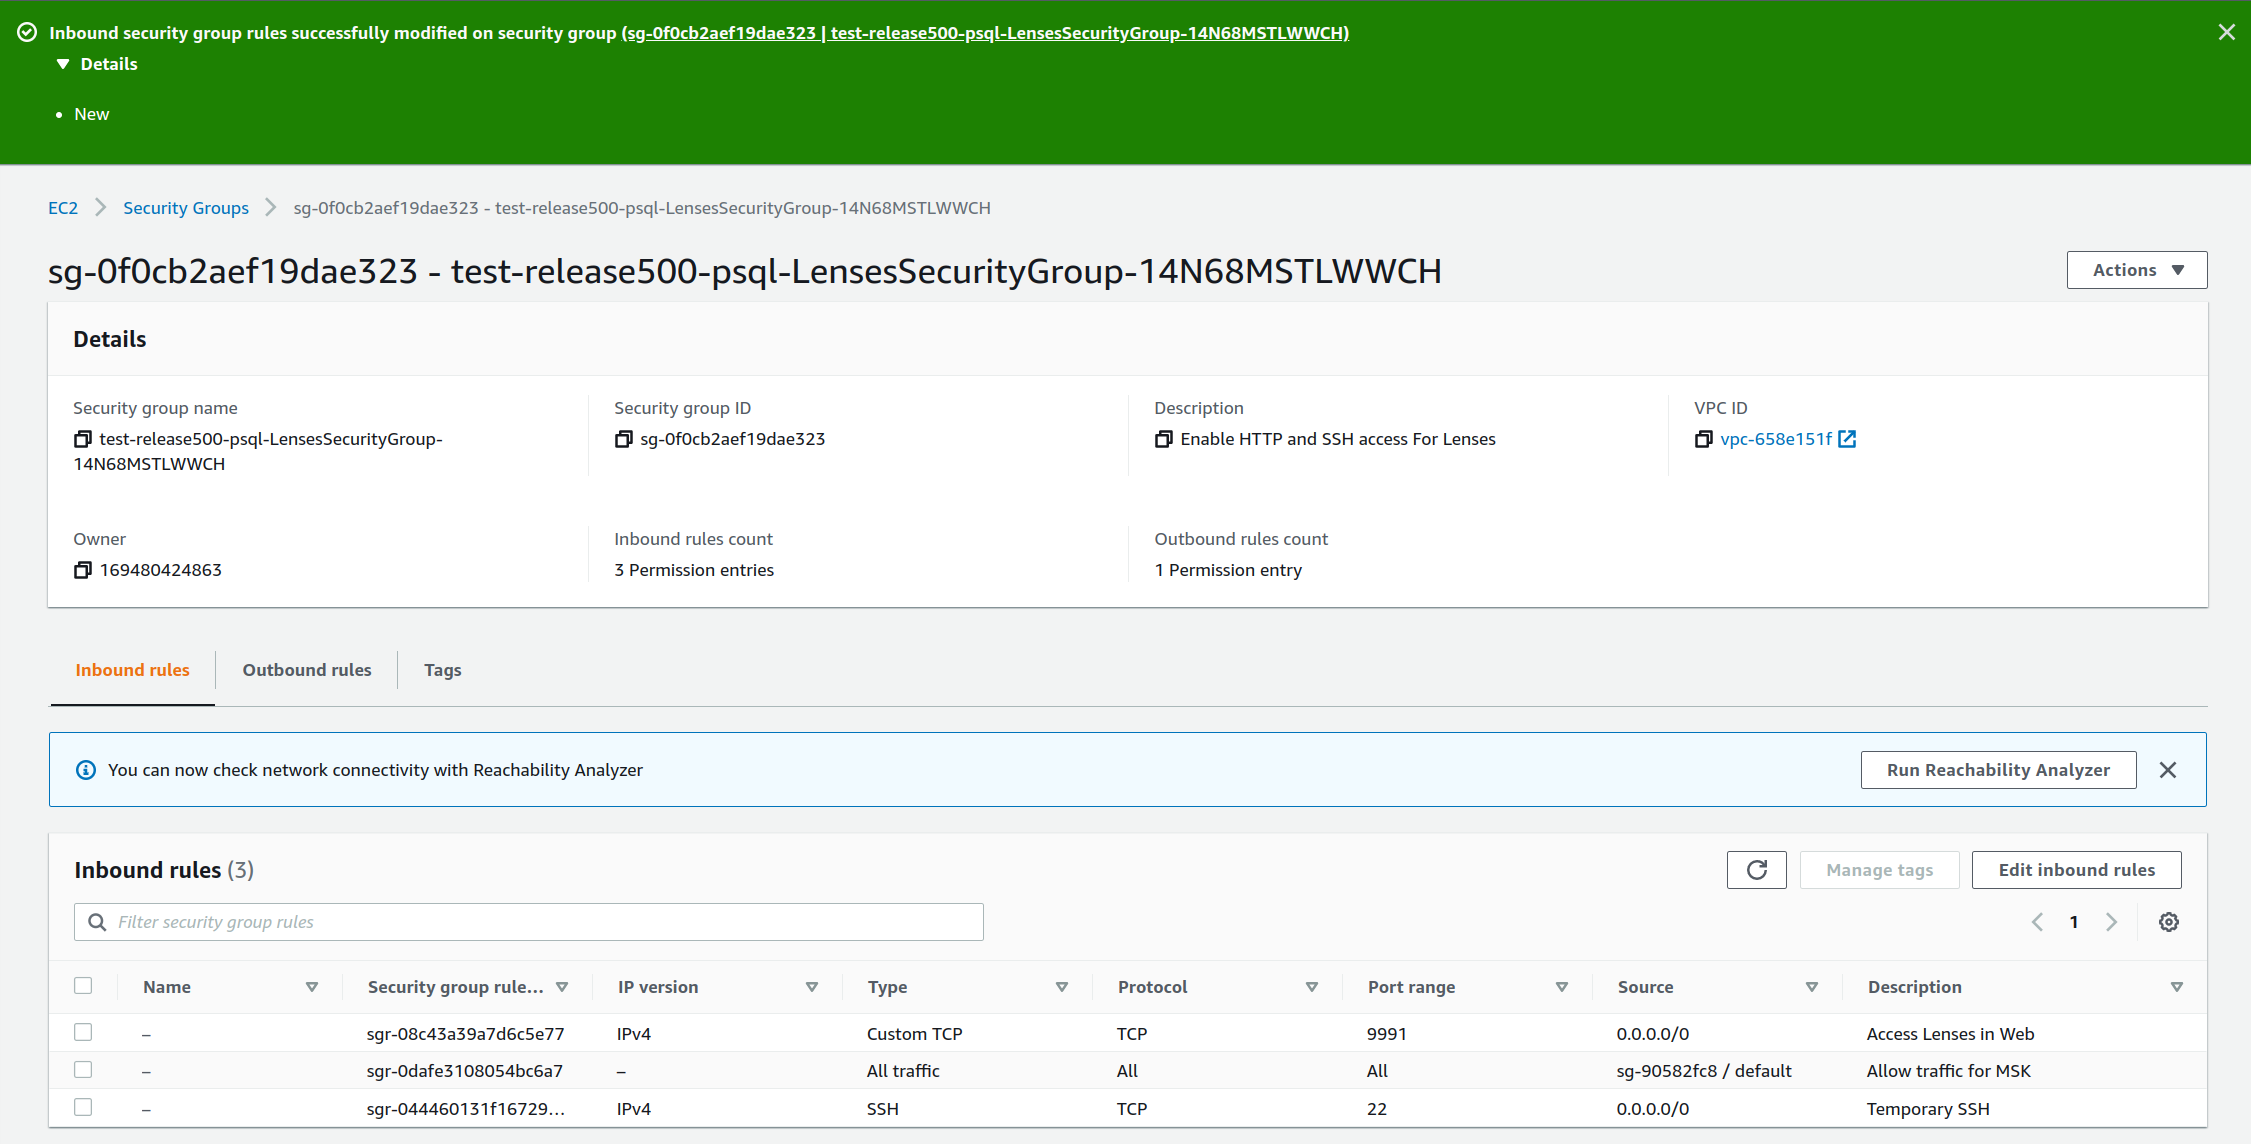 |
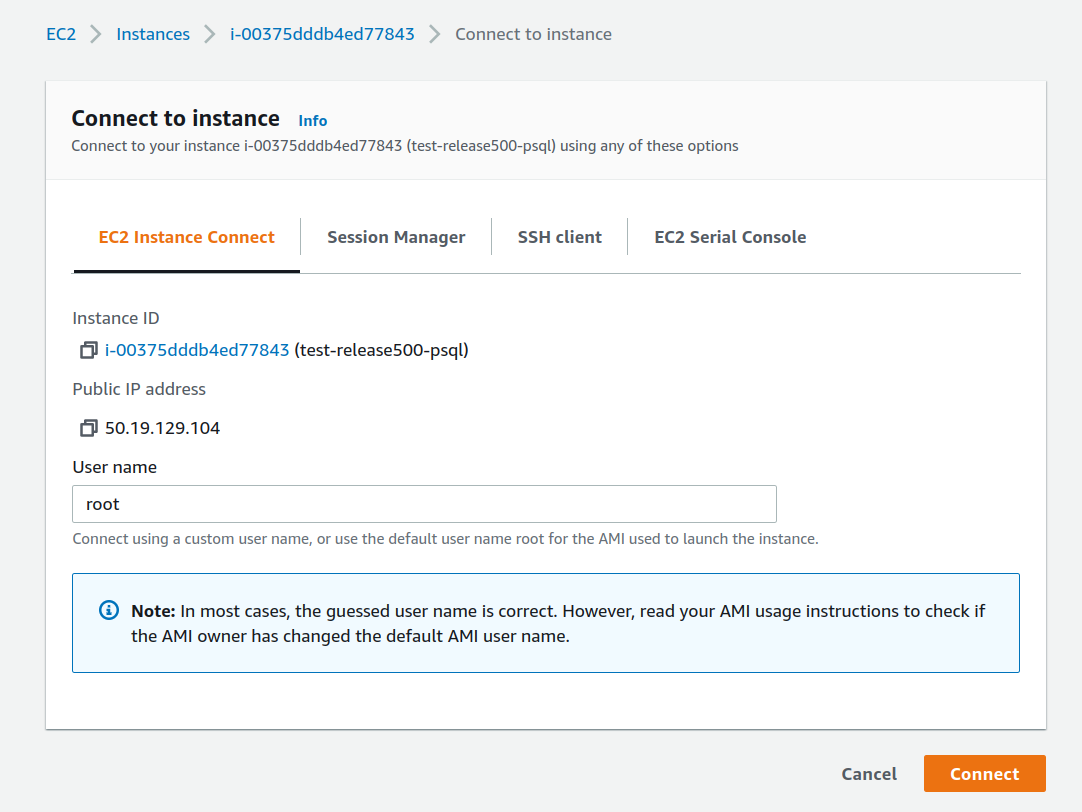
4) Go back to instance details and hit the Connect button. It will take you to the EC2 Instance Connect screen, to SSH via the browser. Leave parameters user root as is and hit Connect
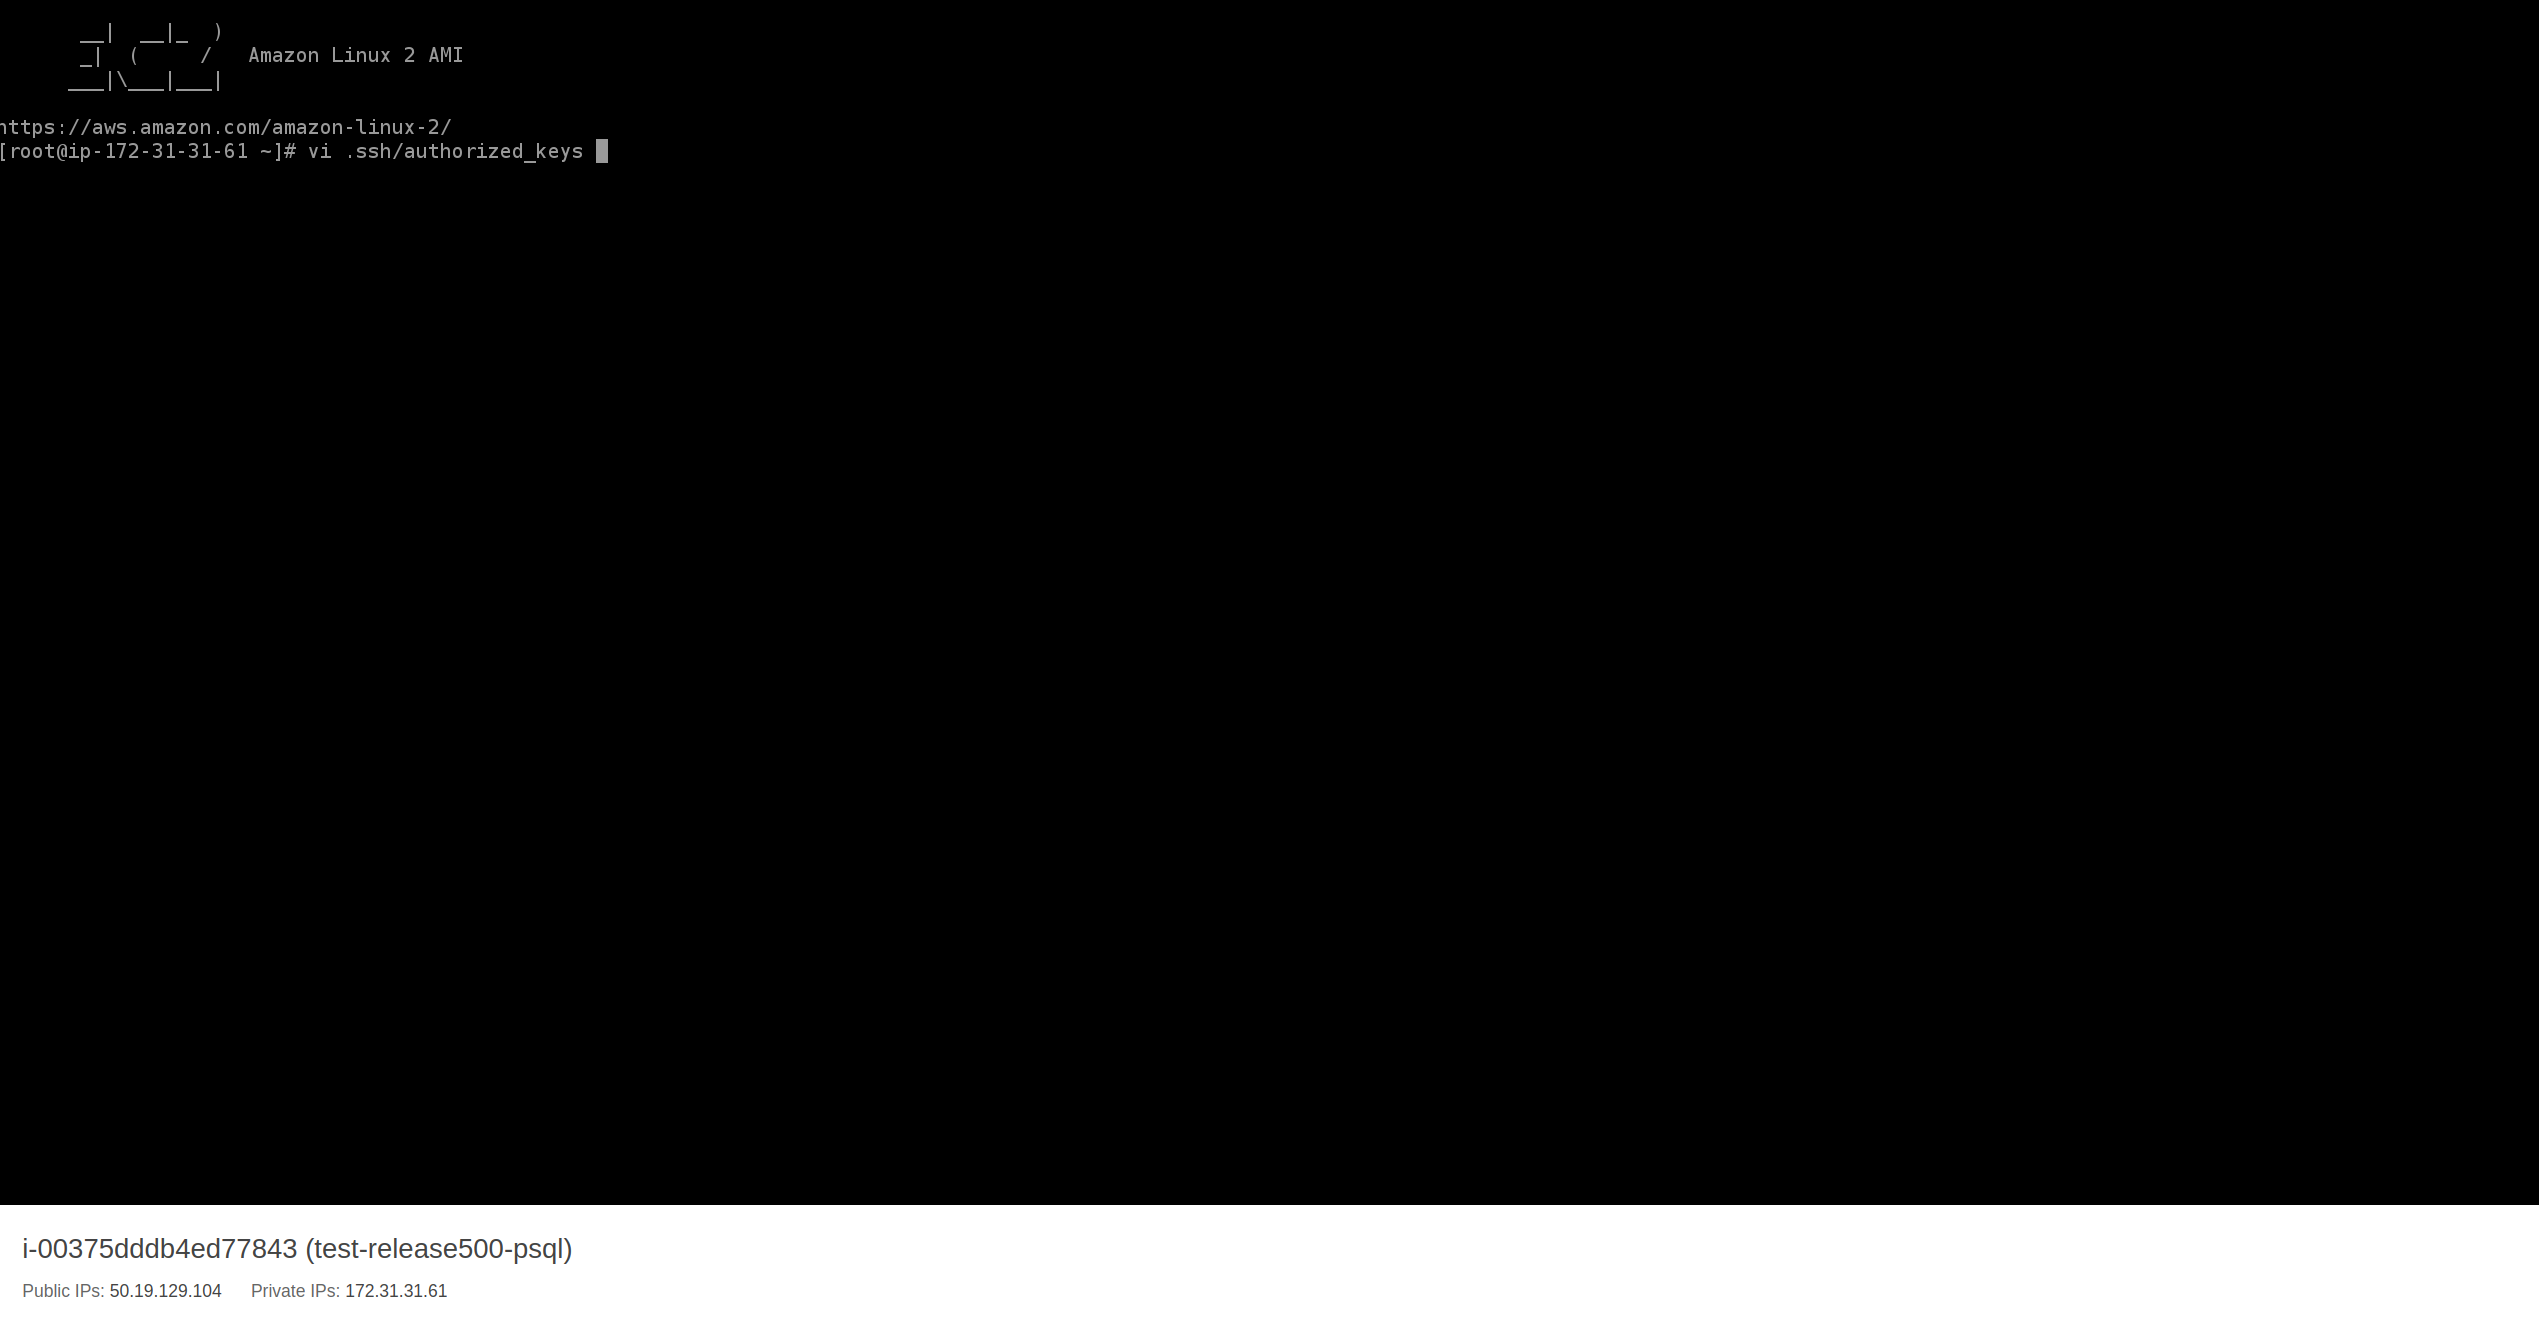
Use the browser terminal to edit ~/.ssh/authorized_keys file.
 |
|---|
 |
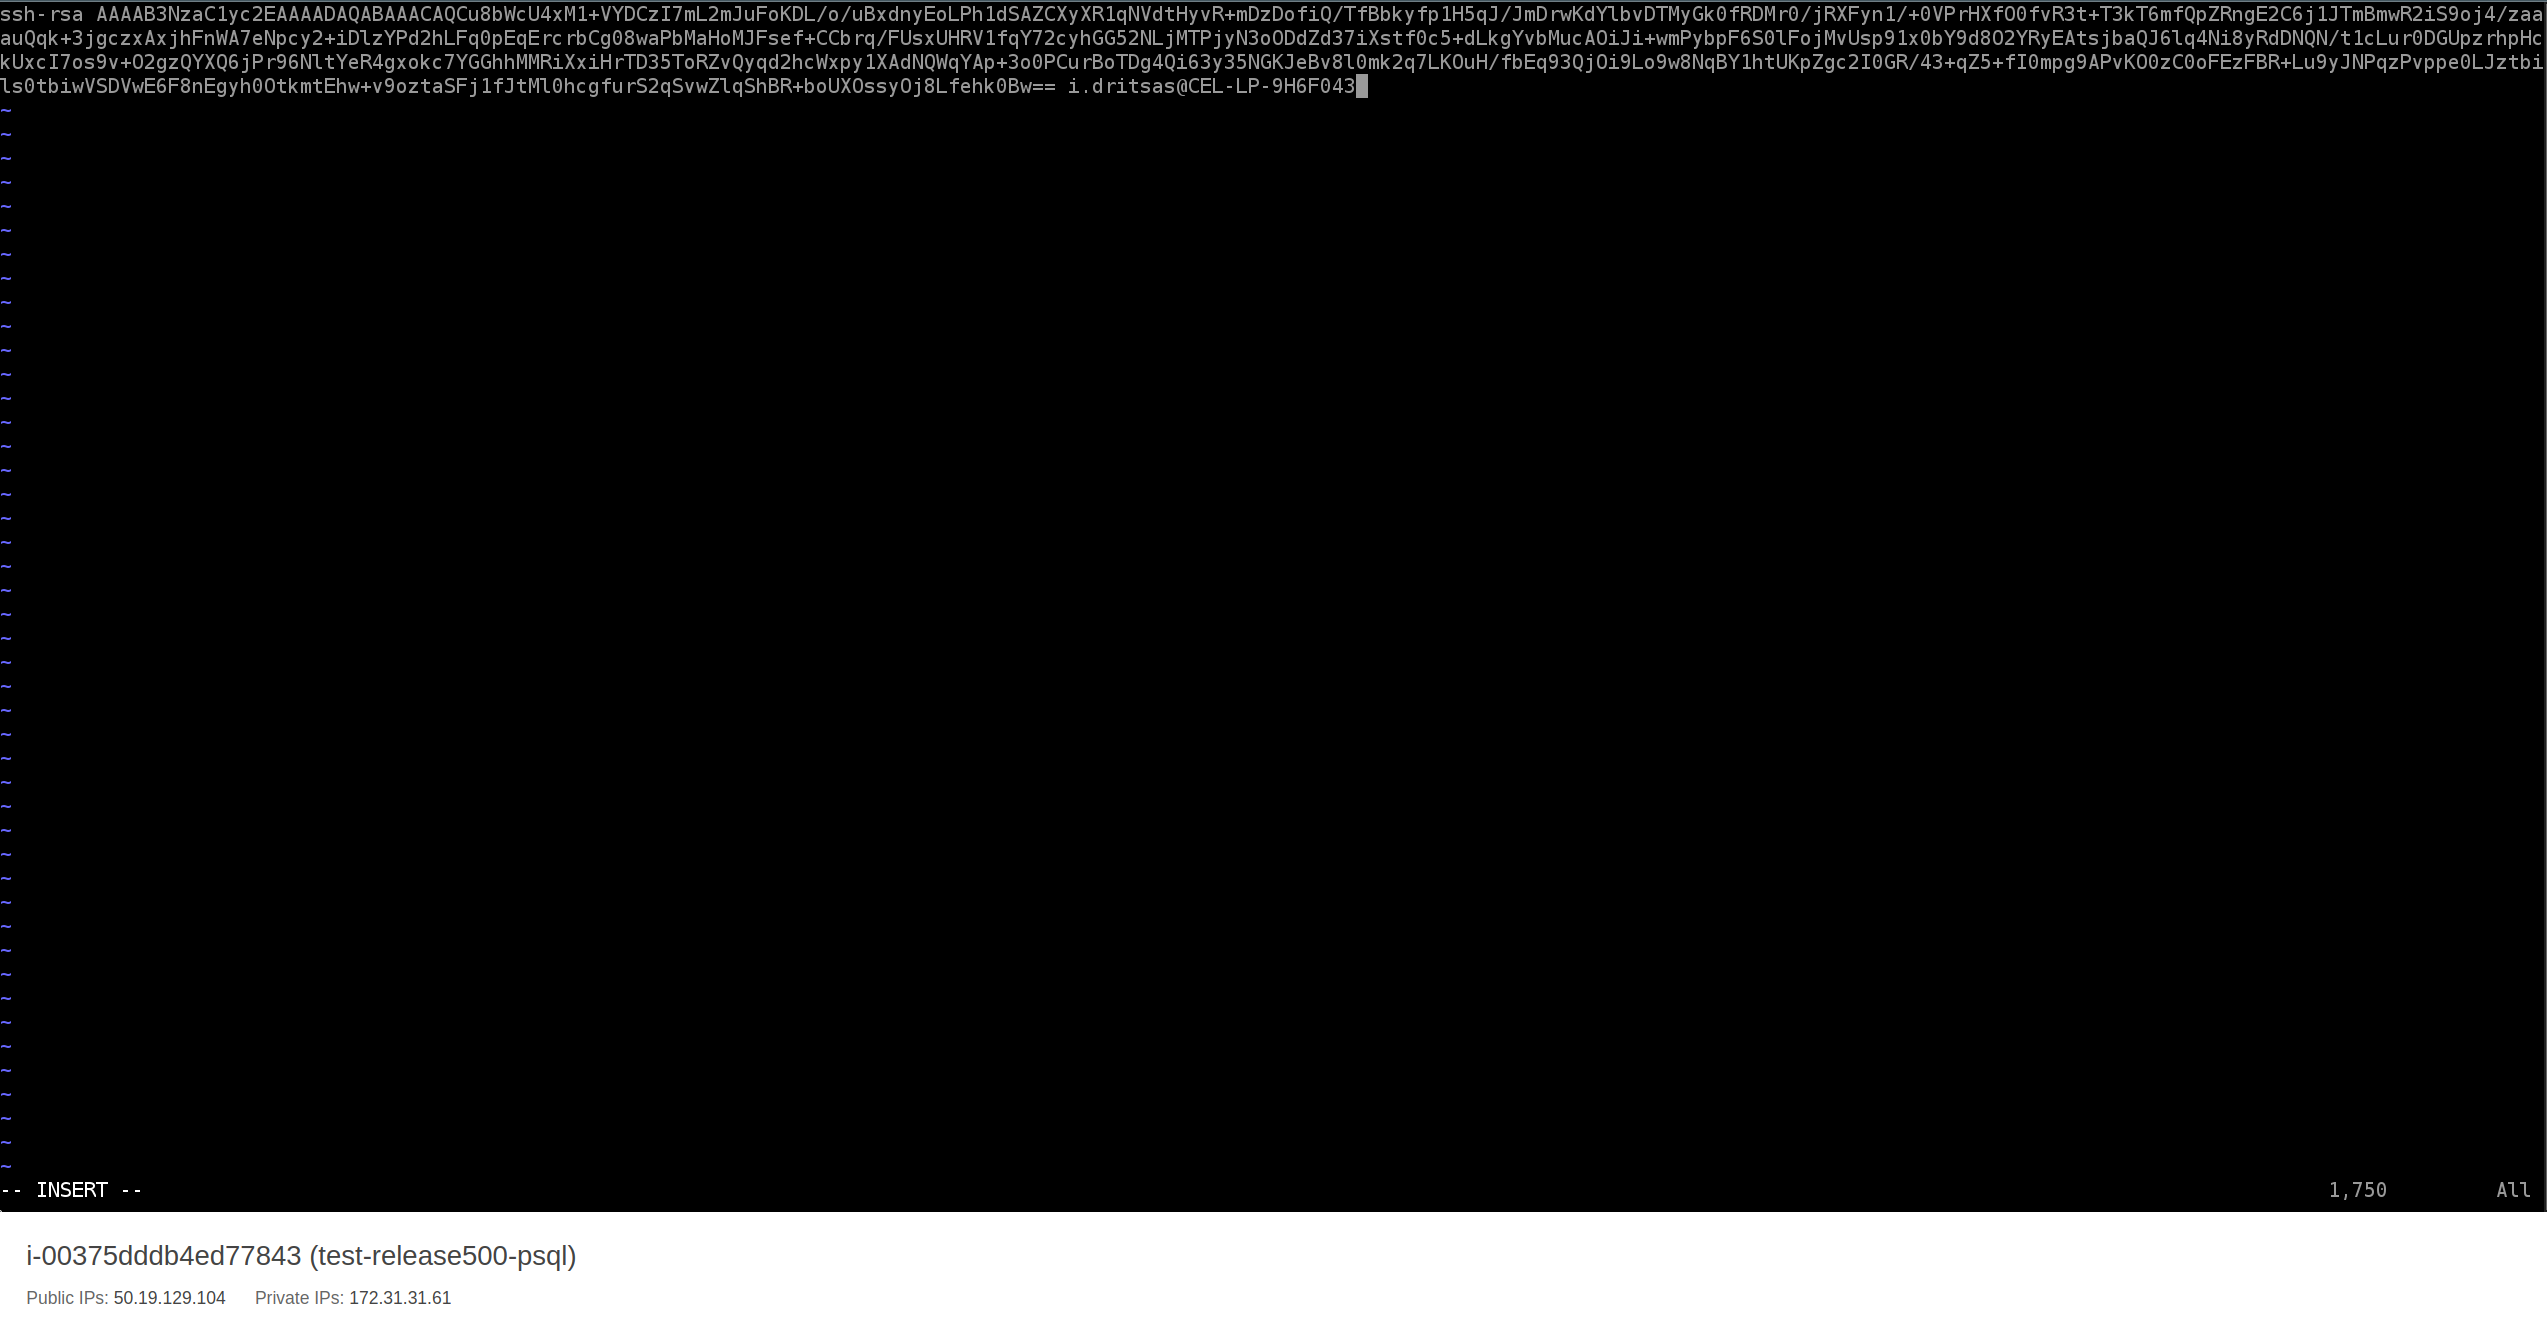
5) Assuming you have an SSH keypair, copy the public key content to ~/.ssh/authorized_keys. EC2 Instance Connect terminal, uses Ctrl+V to paste copied content from outside the browser screen (such as clipboard). Save the file when done.
You can generate a new secure keypair using ssh-keygen -t rsa -b 4096 command.
 |
|---|
6) Now, after adding a public key, you no longer need EC2 Instance Connect so you can restrict SSH either to a specific IP address, e.g. a VPN server address or only your own public IP, using option My IP on the previous SSH rule.
 |
|---|
 |
7) You can now connect from your local environment to the Lenses Instance, using the private key as root user. Remember to revoke SSH access when done.

Summary
Lenses adds to Amazon MSK a secure User Interface with DataOps capabilities for:
- Data discovery
- Data security
- Data governance
- Data monitoring
- Data observability
- Data alerts
Installation methods
1. Secure AWS installation
2. AWS marketplace (Hourly usage)
3. AWS marketplace (BYOL - Bring Your own license) - get a
trial license
4.
AWS EDP Private Offer contact us for an AWS EDP offer.